Monday, December 17, 2018

December 17 -- Festive fudge!

 
At our house, it wouldn't be Christmas without a couple of kinds of fudge. This one is our all-time favorite.

HEAVENLY DELIGHT
1 cup peanut butter chips
1 cup semisweet chocolate chips
2 1/2 cups sugar
7-ounce jar marshmallow fluff
3/4 cup evaporated milk
1/4 cup butter (1/2 stick)
1 tsp. vanilla

Line an 8-inch square pan with foil, extending the foil over the edges of the pan. Measure the peanut butter chips into a small bowl, and measure the chocolate chips into a second small bowl. Set aside.
 
In a heavy 3-quart saucepan, combine the sugar, fluff, evaporated milk, and butter. Cook over medium heat, stirring constantly, until the mixture boils. Boil and stir 5 minutes. Remove from the heat and stir in the vanilla.

Immediately pour half of the hot mixture into the peanut butter chips.  Stir until the chips are completely melted and incorporated into the hot mixture. Quickly pour the peanut butter mixture into the prepared pan.

Stir the remaining hot mixture into the chocolate chips until they melt and are completely blended in. Quickly spread this mixture over the peanut butter layer.

Cool the fudge completely before removing it from the pan. Lift the fudge out of the pan by the foil, put it face down on a plastic cutting board and peel off the foil. Cut the fudge into 1” pieces.

This terrific recipe is from an old favorite cooking newsletter, Cook & Tell, no longer in publication.  The actual name of this candy is “Double-Decker Peanut Butter Fudge”. But when Esther, my daughters’ college roommate and friend, tasted this, she promptly named it “Heavenly Delight”. And so it has been, ever since.

Sunday, December 16, 2018

December 16 -- Christmas heirlooms

 
I was extremely fortunate to have some special Christmas things handed down to me. Oh, they weren’t big, expensive, valuable items. Some would probably call them “trinkets” or even “junk”. But to me they are very precious -- part of my heritage.  (At the top of the post you see my grandmother's Christmas tree in the early 1950s.)
I have 2 of these vintage felt snowmen.  See how they resemble snowflakes?  Love the "holly berry" hands & feet, too.
Many years ago my great-aunt gave me some old glass ornaments that had belonged to her and her late husband. Even though the ornaments are faded now and some are chipped, I continue to put them on the tree each year, along with some antique felt snowmen and elves. There were also some of those colored heavy foil reflectors for use with the old-time Christmas lights. On years when we put colored lights on our tree, I still use the reflectors even though our modern lights are much smaller and they have to be put on just so to make them fit.

Here you can see several vintage glass ornaments, plus a felt elf lady and one of the heavy foil reflectors in blue.
The same great-aunt also gave me some wonderful vintage Christmas fabric and a box full of Christmas candles. There were carolers and a lamp post, angels, and other things. I always loved seeing such candles around when I was a child, but it’s hard to imagine actually lighting one of them. (Incidentally, the Vermont Country Store carries such candles, so they’re still available if you know where to look.)
One of my favorites from childhood
My grandmother was a real lover of Christmas, and she kept a good stock of whatever was needed to make the holiday special. She gave me a whole box once of things she was getting rid of -- mostly paper goods -- and in it were some real treasures. I had always marveled that there were actually such things as paper doilies done in Christmas prints. Gram had lots of them -- with holly, poinsettias, and so on. I felt extremely fortunate to find some of those -- several different sizes and prints -- in that box, and for years I used them very sparingly. In the past few years I have found some lovely Christmas paper doilies in the dollar stores and at Target, so they’re still out there.
Gram also gave me a box full of wrapping paper, ribbon, and tags. I have had a wonderful time using these things over the years. I still have some of the ribbon and tags, and included some of the tags and a few snippets of ribbon in the Christmas memory books I’ve made for family members.
 
Recently I've also acquired more Christmas heirlooms as I've been cleaning out my childhood home.  I'm really thinking that this year I am not even going to bother to get my more modern ornaments out of the attic, but will do a completely vintage tree.  And I'm happy that my parents' tree skirt (handmade by someone in the 1950s or 1960s) is going to be used by my Nevada daughter and her family!

What about you? What are your Christmas heirlooms? If you don’t have any, but there are things you remember from childhood Christmases, take a look on Etsy or eBay.  You'll be surprised what you can find, and rather inexpensively, too.  Or, you might like to consider making some special things to hand down to your family.  I have done that, too, and may post about it in the coming week.
The plastic reindeer is from my childhood.  Bottle brush tree and glittery house are newer treasures from Gooseberry Patch.

Saturday, December 15, 2018

December 15 --Two simple but fancy-looking Christmas cookie ideas


Here are two great tried-and-true Christmas cookie ideas which are much easier than they look.  These cookies are easy but very pretty and fancy looking.  The first one starts with a baked pan of brownies.  My mother (who invented these as far as I know) always used the brownie recipe from the Betty Crocker Cookbook, but certainly it will work with any brownie recipe or even a brownie mix. 

The second idea is one I heard on Gus Saunders' Yankee Kitchen radio program, which I often listened to years ago.  Someone called in this idea, which uses purchased fig bars, and I tried it.  Delicious, pretty, and almost no work.


Both of these will make your cookie plates look fancy with very little work on your part:
1) Poinsettia Brownies

My mother always made these to add to her gift trays of cookies at Christmas. Bake brownies as usual and let them cool. Before cutting, frost the brownies with a simple white butter frosting and mark them into squares. Using slices of candied cherries (note: NOT maraschino cherries, which could make quite a mess), form poinsettias on the top of each square. Cut the brownies along the marked lines. You can make this even simpler by using brownie mix and canned frosting.
 
It just occurred to me today that it would be cute to use the two-bite brownies to make these.  I think I'll pick up a package, along with some candied cherries, and give it a try.
2) Fancy Fig Cookies
These start with purchased fig bars (like Fig Newtons®). Cut the bars in half lengthwise to make sticks, or in half diagonally to make triangles. Dip the pieces in melted chocolate, then in chopped nuts. Place on foil-lined baking sheets and chill until chocolate is set.

Enjoy!

Friday, December 14, 2018

December 14 -- Friday five


Time for Friday five again!  I'm just for the most part using photos from previous years in this post, as I haven't yet finished my Christmas decorating (or shopping, or wrapping, or card writing, or cookie baking).  I seem to have been spending my time on higher priority pursuits this season, and that's okay.  On with the Friday five:

1.  Getting to walk four out of five days this week.  I don't take that lightly because it's by no means a given, this time of year.  Even though some of the days have been really cold -- yesterday was 10ยบ -- we've had dry roads and that is such a blessing.  We don't even need boots!

2.  Being able to attend our granddaughters' winter concert on Monday evening.  (One is in the chorus and the other in the band.)  I was planning to go, but it didn't look likely for Mr. T to be able to get there.  It was neat to see God's hand orchestrating events so that he got home from other responsibilities much earlier than expected and was able to get to the concert and see all of it.  The kids did an amazing job.  Their public high school has a fantastic music department (as does the local elementary school).

3.  Finishing my last "official" handmade gift (there are still a few more small projects I'd like to do) and getting most of my Nevada gifts sent off.  Just one more box to go, I think.

4.  Seeing a Pileated Woodpecker on a roadside tree during our walk on Wednesday.  What a gift!  They tend to stay deeper in the forest.  This is the closest I have ever been to one.  Of course, I didn't have a camera, but the scene looked just about like the one below.  You can't really tell from the photo, but a pileated woodpecker is just about the size of a crow.  They are large birds.
Photo from All About Birds
5. A busy but profitable afternoon yesterday as I combined tree decorating, cookie baking, and several household tasks.  Today promises to be another busy day, so I am trusting God for strength and wisdom for it as well.

And that is my Friday five for this week!

Thursday, December 13, 2018

December 13 -- Sacher Torte Cookies


Here is another of our favorite Christmas cookies. This recipe also has appeared on my blogs numerous times, but for those who are new I really must share it again.  I've made these cookies each Christmas for well over 30 years and it would just not seem like Christmas without them.  One of my daughters likes these so much that I give her some for Christmas each year on a special new holiday plate or in a special holiday tin.

SACHER TORTE COOKIES

1 cup butter, softened
1 (4 1/2 oz.) pkg. instant chocolate pudding mix
1 egg
1 teaspoon almond extract
2 cups flour
3 tablespoons sugar
1/2 cup apricot (or raspberry) jam
1/2 cup chocolate chips
3 tablespoons melted butter

Heat oven to 325°. 


In a large mixing bowl, combine butter and pudding mix; cream together until fluffy. Beat in egg and extract. 

Gradually add flour, beating at low speed with mixer until dough forms. Shape dough into 1” balls. Dip balls in sugar. Place 2” apart on ungreased cookie sheets. With your thumb, make an imprint in center of each ball. 

Bake for 15 to 18 minutes or until cookies are firm; remove from sheets immediately to wire racks to cool. When cookies are cool, fill each indentation with about 1/2 teaspoon jam. In a small saucepan, or in microwave, blend chips and butter over low heat until chocolate melts, stirring constantly. Drizzle about 1/2 teaspoon chocolate over each cookie.

Yield: About 4 dozen cookies.


(Some people prefer not to use instant pudding mix.  I have found that the Land'O'Lakes recipe for chocolate butter cookies works perfectly for the cookie part of this, with no instant pudding mix needed.  You can find the recipe here: Chocolate Butter Cookies.  I've used this a number of times when I was out of pudding mix, and think I almost like it better!)
 

These cookies look pretty and fancy but are very easy to make. I believe I found the recipe in a Yankee magazine article about the Wellesley Cookie Exchange.

Wednesday, December 12, 2018

December 12 -- the Wednesday Medley

 
 Somehow it's Wednesday again, and time for the Wednesday Medley hosted by Terri at Your Friend from Florida!   Terri asks the questions and bloggers come up with their own answers.

 Wouldn't you like to join in also?  Just head over to Terri's blog, get the questions, then copy, paste, and answer them on your own blog.  Then you can go back to Terri's and link up!  Here we go with the questions:

1.  National Ding-a-Ling Day is observed across the United States each year on December 12.  Ding-a-Lings on this day call the people they haven’t heard from in a while.  It may be an old classmate, co-worker or neighbor from years ago.  Or perhaps a call will go out to the child who used to mow the grass during the summer.  How about that couple who carpooled for soccer. There are all sorts of people in our lives who manage to slip out of our lives who would love to hear the ding-a-ling of a call from you or me.  So tell us who you want to call today!
 
Maybe I'll call my friend Paula.   She's a dear friend who moved to a different part of our state last year.  There have been a few notes and e-cards, but I would really like to chat with her and catch up on what's happening in her life.

2.  Each year on the 12th day of December, people across the United States recognize National Poinsettia Day.  I am including this "National Day" too because my neighbor's poinsettia from last year is blooming beside their house!!  Have you ever tried to plant a poinsettia outside?
 
No, I never have.  I have enough trouble keeping poinsettias alive inside.
 
Vintage card from my collection
3.  Do you believe in Bigfoot?  What size shoe do you wear and do you have trouble shoe shopping?

Not sure if I believe in Bigfoot or not.  I wear an 8 1/2 shoe (9 in sneakers) and no, I don't have trouble shoe shopping.  I just find a style I like and keep buying it in different colors.
 
4.  What is one thing you refuse to share?
 
Probably nothing.   I was going to say "my toothbrush", but my hubby has used it by mistake a few times. 

5.  Are you finding that this Christmas is stressful? More or less than last year?  
 
I don't think it is really stressful (not yet, anyway) but  it does seem busier and more rushed than last year.  Although my hubby has baked one batch of Christmas cookies, I've yet to bake a single cookie.  (The photo below is from last year.)
6.  Tell us something random about your week so far!
 
So thankful to have finished all of my handmade gifts! There are a few more things I would like to make, but the important ones are done ... and some are even on their way to Nevada.  Gotta love that USPS carrier pickup!

Tuesday, December 11, 2018

December 11 -- How to make a simple ribbon board


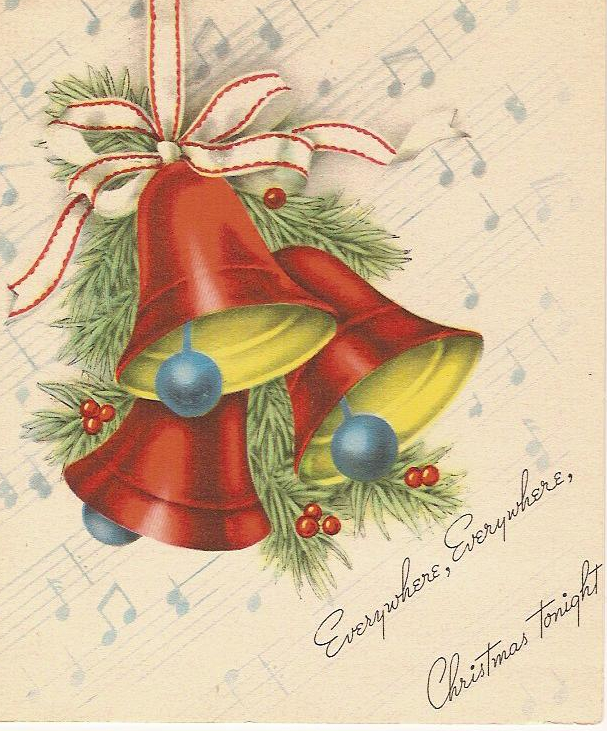
  Today's special feature is a simple ribbon board to display vintage Christmas cards  (like the one above and at the end of the post) and other paper treasures.  I've shared this before, but I know that newer readers may not have seen this easy idea.   This isn't a real tutorial, but just a simple explanation of how I put this together.  If any point needs clarification, just ask.

As I've mentioned, I have a nice collection of vintage and antique Christmas cards, all given to me over the years -- oddly enough, by people who knew I used old Christmas cards in art projects with children in school and Sunday School. Many of these cards probably have no real value -- some of them have the backs removed, and many have had the signatures cut out. But they are valuable to me because they are so beautiful. For years I wanted to display them, but couldn't think how -- I didn't want to damage them further with tape or tacks or staples. I inherited a nice glass-topped desk, and displayed some of the cards under the glass. But I still wished I could display more of them -- because, to me, no matter how lovely a collection may be, if its beauty can't be shared with others, it's really not worth having. I know people who have treasures like this squirreled away in shoeboxes, and it's absolutely ridiculous because no one -- including the owner of the collection -- can enjoy them there.

So I came up with the idea of using a large ribbon board to display my vintage card collection. I made a very, very simple one, and it has worked well for quite a few holiday seasons now. I took a full sheet of foam core board and covered it with fabric. (You could use a holiday fabric, but I felt that a solid color would be the best background for the colorful variety of my cards, so I chose a plain dark green fabric.)  Very simply, I cut the fabric a couple of inches larger than the board all around, placed the board face down on the fabric, neatly wrapped the excess fabric to the back of the board, and hot-glued it in place.  To hang the board, I made a loop of festive red/green holiday cord, and hot-glued that to the back as well.
Next, I took lengths of red satin ribbon and tacked them diagonally across the board one way and then the other, gluing the ends of the ribbon to the back of the board. You should be able to see quite easily from the photo above what I did here.  At the places on the front where the ribbons intersected, I used shiny brass tacks to hold the ribbons in place. All those ribbons made nice secure spaces in which to tuck my cards. 
I hung the board in my front entryway and it holds a great many of the cards in my collection -- the vintage cards are much smaller than the cards we send today. This card-filled ribbon board makes me happy every time I walk by it!

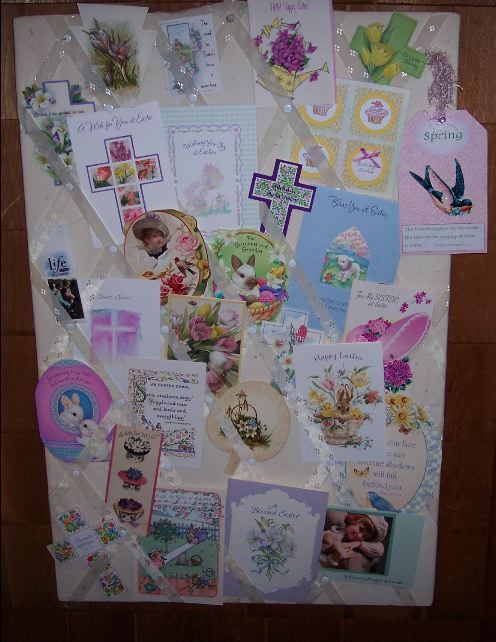
In fact, the idea worked so well for me that I made a second ribbon board in neutral colors -- using unbleached muslin for the fabric and ivory ribbon -- to hold the paper treasures I've collected for other seasons as well.
Easter ribbon board
ribbon board for fall
Winter ribbon board
  I know that ribbon boards are not a new idea, but I haven't seen any just like mine. I hope someone else will try this idea for a special collection of treasured paper items.  It would even work beautifully to display this year's Christmas cards as they arrive!