Monday, December 31, 2018

December 31 -- Hot Pizza Dip for New Year's Eve


Photo from Taste of Home
With New Year's Eve coming up tonight, I thought it would be the perfect time to share a recipe for an easy hot dip that uses basic ingredients and can be simply heated in the microwave.  I'd really be surprised if you don't have the ingredients for this appetizer in your pantry or fridge already!

We sometimes celebrate New Year's Eve at church or with friends with a simple time of fellowship, food and board games. I have often brought this dip, along with breadsticks, and a large tray of Christmas cookies from the freezer.  It doesn't get much easier!

HOT PIZZA DIP

One 8-ounce package cream cheese
1 teaspoon Italian seasoning
1 cup shredded mozzarella cheese
3/4 cup grated Parmesan cheese
1 cup pizza sauce OR spaghetti sauce
2 Tblsp. chopped green and/or red pepper*
2 Tblsp. thinly sliced green onions*
Breadsticks or tortilla chips for dipping

In a mixing bowl, beat the cream cheese and Italian seasoning together. Spread the mixture in an ungreased microwave-safe 9-inch pie plate.

In a bowl, combine the mozzarella and the parmesan. Sprinkle half of this mixture over the cream cheese in the pie plate. Spread the sauce over the top and then sprinkle all of the remaining cheese mixture over the sauce. Top with the chopped peppers and the green onions.

Microwave the dip uncovered on High for 3 to 4 minutes, rotating the plate a half turn several times if your microwave does not have a turntable, until the cheese is almost melted. Let stand for 1 to 2 minutes before serving with breadsticks or tortilla chips.

* You can top this dip with almost anything -- I have used finely chopped pepperoni, peppers or green onions only, a combination of the three -- or I have just simply topped it with a sprinkle of pizza spice. It doesn’t seem to matter what you use -- the dip is going to get gobbled up regardless. I very often bring this to potlucks because people enjoy it so much. I usually make two of these, and there is still never any left to bring home.

Sunday, December 30, 2018

December 30 -- Making little boxes out of used Christmas cards


Here is one more project using cards.  These are fun!

Most people have probably seen those little boxes made from Christmas cards. These are the easiest directions I have ever found. Most of the instructions I've seen involve a lot of folding and drawing of complicated lines, etc. These are actually easy!
The boxes can obviously be made from any greeting card, not just Christmas ones. These make great little gift boxes or can be used to hold office or craft supplies like paper clips, tacks, push pins, beads, etc. Christmas ones can be hung on the tree or piled beneath a miniature tree, where they look adorable.  One creative person used them to decorate a wreath, as I saw in an old magazine (photo below), but obviously this would need to be an indoor wreath to protect the boxes from dampness.
As you look over your stash of old cards, it will quickly become clear to you that not every card will work for this.  It needs to be either an allover design or perhaps something floral, like the poinsettia and mistletoe cards I chose.  (If you don't have any suitable cards and want to try this anyway, then simply use any cards you like and then wrap the finished boxes in wrapping paper.)
Here's what you do:

1. Cut apart a greeting card along the fold, separating the front from the back.
2. Start with the back part of the card. Using a ruler, draw lines from corner to corner on the unprinted side of the card to form an X. The center is where the two lines of the X meet.
3. Fold up each of the four sides of the card to meet the center of the X. Crease the folds well.
4. Open the card back up to reveal the creases you've made. Now, holding the card vertically, carefully cut on the two vertical crease lines at the top and bottom of the card, just to the point where they intersect with the nearest horizontal crease.
5. Fold in the tabs you just created by following step 4. You can now see how this is going to form a box. Tape the tabs inside the box. (You may find that each end of the box -- the part between the tabs -- stands up a bit higher than the rest of the box. If this happens, it is not a problem. You can simply fold the excess down inside, over the tabs, and tape it in place. Or, if you prefer, you can simply trim off the excess card before taping.) You have just made the bottom of the box!
6. Now, repeat steps 2 through 5 with the front part of the card, which will make the top of your box.
7. Obviously, this produces a box top and bottom which are exactly the same size, which sometimes means that the cover doesn't go on too easily. Usually, if you just squeeze the sides of the box gently, the cover will go on just fine.
These directions look far more complicated than the process actually is. I've made loads of these boxes with kids over the years, and it really is easy enough for even a 5-year-old to do with some guidance and maybe a bit of help with the creasing. So have fun with these cute little boxes!
 

Saturday, December 29, 2018

December 29 -- Making gift tags from your old Christmas cards


Christmas cards are so beautiful!  I simply love them.  As I continue cleaning out my childhood home, I am discovering afresh that this was also my mother's opinion.  She bought many, she sent many, and she certainly saved many, both new and used.  I am also discovering that many, many people love and collect vintage Christmas cards, and I have the Etsy sales to prove it.  I also have a good-sized vintage card collection of my own.

Yet I find that I simply cannot keep all of the cards which we receive.  I do keep them in a basket for a year, hope springing eternal that one year I will actually follow through on pulling out a card at supper each evening to pray for the person who sent it.  After that year is up, the cards are fair game to be repurposed in other ways.   One of the most obvious and easy ways to use your old Christmas cards is to make gift tags from them. There are a couple of ways to do this.

Sometimes you can use the entire front of a card as a tag, if it has enough blank space to write the to/from information. These are especially nice for family members -- for example, you might have a card front that says "Merry Christmas to a Dear Granddaughter." This is a natural to paste to the top of your granddaughter's Christmas present. These can add a real decorative element to a package wrapped in a solid color like red, green, blue, silver, etc.

The other way is to cut shapes from your old cards to make tags. You can make simple shapes like rectangles, squares or circles. Current, Inc. sells a set of tag templates which work very nicely and has quite an assortment of shapes. A book of children's Christmas stencils would also work well. Once you have cut your shapes you can punch a hole in each one and add some red, green or metallic string to make a hanging tag. 

You could even embellish your tags with glitter, touches of paint, bits of ribbon, or other embellishments, if you are so minded.   Of course, many cards are already well glittered!

What if your family doesn't receive a lot of cards but you'd still like to do this project?  Easy -- just let friends or relatives know you would be happy to take used cards off their hands.  I promise you will have all the cards you will ever need!

This simple project is a fun way to keep your kids busy during Christmas break -- and I personally find that doing a project like this, even all by myself, is very relaxing and a great stress reliever.  There is nothing like cutting and pasting, for me.
Have fun with this idea!

Friday, December 28, 2018

December 28 -- Friday five


Yes, Friday again, and time for another edition of Friday Five!

1.  Another wonderful time of fellowship with a couple we are informally discipling.  There is just nothing like it.  So thankful God led us to do this and that we took heed to His leading.
Gorgeous graphic from Abby's 25 Days of God-Given Gifts

2.  A good day at church on Sunday and the blessing of going Christmas caroling as a church family.  When you see a teenage boy playing a jaw harp, a college girl toting an accordion, and a little boy ringing jingle bells as we sing to folks who are homebound, it just warms your heart.  Theirs, too.  Watching older folks sing along to the familiar carols is such a blessing.

3.  A productive and yet very relaxed day on Christmas Eve.  I delivered a few kitchen gifts and did a lot of Christmasy puttering, tweaking the decor, wrapping a few gifts, etc.
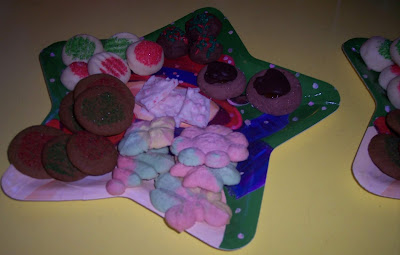
Cookie tray from 2013
4.  A wonderful Christmas Day and especially the blessing of spending it with this amazing 10-year-old and his parents and siblings.  I am so blessed as I see what a wonderful mommy and wife my daughter is.  No credit to me -- to God be the glory!

5.  A nice long walk the past couple of mornings.  It's been very cold, but the roads are fine for walking and it's been nice and sunny.  We finally conquered a hill we've been trying to get up for months.  It's very long and steep and we had thought that maybe by spring we would make it.  It's still December and we've done this hill twice now!  A feeling of great accomplishment!
Along our walking route, last winter
There you have my Friday five.  How about you?  Might you have five blessings to share from this week?

Thursday, December 27, 2018

December 27 -- Icicle and snowflake garland


Here's an idea for a winter garland that can be put up at Christmas (although it need not be) and then stay in place for the wintry months.  I keep mine up all year and change its decor with the seasons.

I have a gorgeous evergreen garland (which I got for free) with attached pinecones and berries. I have woven a string of white lights into the garland. I keep it above my picture window and, as I mentioned,  change it up seasonally.

Sometimes I add other fun items, like this Christmas card, to the garland as well as snowflakes and icicles.
Now, right after Christmas, might be the perfect time to find an evergreen garland inexpensively.  So if you are interested in one, shop the clearance sales when the Christmas items go to 75% or 90% off!


 For Christmas, I often trim our picture-window garland with glittery iridescent snowflakes and icicles (both plastic), as seen at the top of the post. The snowflakes are glitter-coated, also. The lights glimmering against the snowflakes and icicles give a truly magical effect. The nicest thing is that I can keep these trims in place all winter!

Wednesday, December 26, 2018

December 26 -- the Wednesday Medley


 Wednesday again, and time for the Wednesday Medley hosted by Terri at Your Friend from Florida!   Terri asks the questions and bloggers come up with their own answers.  Amazingly, Terri did not take this week off, but simply posted her questions on Monday.  Now that is dedication!

 Wouldn't you like to join in also?  Just head over to Terri's blog, get the questions, then copy, paste, and answer them on your own blog.  Then you can go back to Terri's and link up.   Here we go with the questions:
1.  Are there candy canes left in your house right now?  Did you hang some on your tree?  Do you even like them?
Yes, there are several candy canes left.  I hadn't hung any on my tree this year, but I just added the leftover candy canes to the tree.  I like the flavor of candy canes but I really can't imagine eating a whole one.  I use them mostly for decoration or for tie-ons to gifts.
2.  Without a graphic, today is also National Thank You Note Day!  I like receiving that thank you note in the mail for a gift I have given.  Are you good about getting thank you notes in the mail after Christmas (or any occasion calling for a note)?

 I am fairly good at doing so.  I like receiving notes in the mail, but I will take any sort of thank-you (email, verbal) rather than none.  I enjoy writing notes to encourage family and friends.
Image from the Graphics Fairy
3.  How are you feeling on this day after Christmas?  Tired, let down, still glowing?  I have felt all of those at one time or another and sometimes all of them at once! Tell us about it.
 I'm feeling pretty good. I'm feeling quite content that I accomplished almost everything I meant to do, and happy with the decorating I did and the gifts we gave.  All in all, it's been a nice Christmas season (I do not consider it over yet) and we had a lovely day yesterday. I do still have a couple of gift cards to send and hope to do that today.
Kitchen shelf at my daughter Carrie's home -- isn't it sweet?
 4  It is "tradition" to leave the tree and decorations up until after January 6th, to honor the Epiphany. When will your boxes be packed and put away until next year?  Are you, like me, thinking about doing it right now?
 Nope, not thinking about it.  Interestingly, because of cleaning out my childhood home, I did not bring any of our own boxes of ornaments, cards, or wrapping paper out of the attic, so there will be no repacking of those.  I will, of course, have to repack the ornaments I brought from the home place and find room for them in my own attic, but I will prune and consolidate them as I go.

I like to take my time making things festive, and in fact added the last touches on Christmas Eve day.  So I am in no hurry at all to take things down and put them away.  I like to leave the tree up until my birthday in mid-January.  Snowmen, glittery houses, white lights and more will stay up until Valentine's Day, because we need all the light and sparkle we can get up here.
5. Looking ahead to New Year's Eve, do you have plans?  Have you ever celebrated big in New York's Time Square? Would you even want to be there?
No plans -- my hubby will be going to work early the next morning as usual.  Sometimes we have had a New Year's Eve get-together at church -- board games, snacks and fellowship -- but it's been awhile.  With Mr. T's work schedule, we likely wouldn't even be doing that at this point in life.  
Times Square -- nope, never even thought about it and wouldn't even want to be there.

6. Tell us something random about your week so far!
It is just very odd having Christmas on a Tuesday.  Now today feels like Monday all over again.  I realize that Christmas will obviously occur on Tuesday from time to time, but it's very different.
A tin of Whipped Shortbread
And another Wednesday Medley is a wrap.  Happy day after Christmas, everyone!

Tuesday, December 25, 2018

December 25 -- Merry Christmas!


Mr. T and I would like to wish all of my readers and friends a truly wonderful Christmas day as we celebrate the greatest Gift ever given -- our precious Lord and Savior, Jesus Christ.

"For God so loved the world, that He gave His only begotten Son, that whosoever believeth in Him should not perish, but have everlasting life."  (John 3:16)

"Thanks be unto God for His unspeakable gift."  (2 Corinthians 9:15)

Have a blessed Christmas!


Monday, December 24, 2018

December 24 -- A recipe to prepare tonight, for Christmas breakfast!

Photo from Taste of Home
Here is what I'm planning to put together in the late afternoon, to refrigerate overnight and bake for Christmas morning breakfast: Hearty Breakfast Egg Bake!  Back several weeks ago, my walking partner and I were discussing brunch recipes and she shared this one with me, along with the Amazing Muffin Cups that I took to the ladies' Christmas brunch and posted about on my Christmas blog.

The muffin cups seemed a little easier to eat, and a little fancier, for a ladies' brunch, but this hearty egg bake in a 13x9 pan looks perfect for Christmas breakfast.  We will enjoy it with our neighbor Walter's sourdough rye bread, cranberry coffeecake (leftover from the brunch; it's been in the freezer), and clementines. 

Just got in from delivering a couple of cookie trays (I walked, so as to get some walking in; my walking partner was too busy to go today, but the weather is perfect).  Now I'm off to prepare a few last kitchen gifts and wrap some gifts.

How is Christmas Eve day going at your house?

Sunday, December 23, 2018

December 23 -- an easy kitchen gift: Mulled Cider Mix


It's fun and easy to make little packets of mulling spices for gifts. They produce some very yummy cider and make wonderful small gifts. I often include them in gift baskets for our neighbors or in care packages to faraway family and friends. Here's what you'll need to make these:

* Cinnamon sticks

* Whole cloves

* Allspice berries

* Coffee filters

* Plain white string

Break the cinnamon sticks in 1-inch pieces. For each packet of spices, place 1 tsp. of cinnamon sticks, 1 tsp. of whole cloves and 1 tsp. of allspice berries in the center of a coffee filter. Gather the filter up into a little bundle and tie securely with string.


  To package these, I use an idea I found in a Gooseberry Patch book -- Place each bundle of spices in a small brown paper bag. Fold the top of the bag down securely. Make a tag on card stock or half of a file card with these instructions: "Mulled Cider Mix. Place spice bag in large saucepan with 1 quart to 1 gallon of cider. Heat through and enjoy." 
 
Then position the tag at the top of the bag and use your sewing machine, threaded with red thread, to sew the tag to the bag, sewing the bag closed in the process. These look so cute and festive!

Saturday, December 22, 2018

December 22 -- Special Holiday Fudge

 
Photo is from Sun-Maid raisins; I didn't get a photo of the fudge before wrapping it up.


 I made a batch of this on Monday in order to get some of it into the last package to Nevada (before Christmas, that is).

SPECIAL HOLIDAY FUDGE

1 1/3 cups sugar
1 1/3 cups miniature marshmallows
1/4 cup butter or margarine (1/2 stick)
2/3 cup evaporated milk
1/4 tsp. salt
1 tsp. orange extract
1/2 tsp. almond extract
12 ounces semisweet chocolate chips
1 cup raisins (I used golden raisins this time and detected no flavor difference.
1 cup chopped pecans

Line a 9-inch square pan with foil and butter the foil.*


In large heavy saucepan, combine first 5 ingredients. Bring to a boil over medium high heat. Boil 5 minutes, stirring with a wire whisk.  Remove from heat, stir in chips until melted. Stir in the extracts and then the nuts and raisins. Replace your whisk with a spoon and beat by hand until glossy, 30 to 60 seconds. If needed, you may add up to 2 Tblsp. water to make it glossy, but you probably won't need to. Turn into prepared pan. Cool completely; turn out on cutting board and remove foil,  then cut in squares.

This fudge is absolutely wonderful! It really tastes like Christmas!  I found the recipe many years ago in my favorite cooking newsletter, 
Cook & Tell , and have made it nearly every Christmas since then.
If you have a nostalgic fondness for Chunky® candy bars or chocolate-covered raisins, you are sure to enjoy this fudge.
 
* Original recipe calls for simply buttering the pan.  That's what I did when I made the fudge this week.  I let it set in the fridge overnight and it was so difficult to remove from the pan.   That's why I'm suggesting the buttered foil maneuver this time around.

Friday, December 21, 2018

December 21 --- Friday five


Friday again!  How can that be?

Regardless of how it got here, Friday is indeed here and so it's time for another Friday five.  Here goes:

1.  Being able to make a Christmas tree skirt out of lovely Christmas fabric my Nevada daughter had gifted me with some years ago.  I blogged about this in detail over on my Christmas blog (link in sidebar) if you want to read more.

2.  Ladies Christmas fellowship at church last Saturday -- a nice time, and a blessing to see others use their gifts to bring an event like this together.  Again, more details over on my Christmas blog if you would like to read more about this fellowship.

3.  Getting out for a walk 3 days this week.  Yesterday in particular was a gorgeous sunny day.  So thankful for dry roads to walk on even in mid-December.
From a wintry walk last year
4.  An enforced day of rest this week as I wasn't feeling well for most of Wednesday.  I got out to walk, but actually took two lengthy naps.  At the time, I chafed that nothing was getting done, but can only conclude that I needed the rest.
Delightful gift from Abby at Little Birdie Blessings

5.  Friends who share good recipes.  I'm just about to try a recipe for Lemon Shortbread Thumbprint Cookies which a friend shared with me.  And also, my walking partner shared this recipe with me: Amazing Muffin Cups -- and wow, what a good recipe!  I took this to the ladies' fellowship, which was a brunch, and also blogged about it in more detail on my Christmas blog.

In fact, if you haven't been visiting Mrs. T's Christmas Kitchen during this season, you really need to.  I've been posting there every day (as well as here) and I really hope you will stop in and visit for a cup of Christmas cheer.

Another Friday five in the books.  Wow, how swiftly this year has passed!

Thursday, December 20, 2018

December 20 -- Two nutty confections


These wonderful treats will make fabulous kitchen gifts if you still have a few more names on your list!

At Christmastime, all types of snack mixes are popular as gifts and just to have around the house for family and friends to nibble on. These two nutty treats have been particular favorites with us and with those we've shared them with.

The first is a treat for coffee lovers.  My mother loved these.

COFFEE WALNUTS
1 cup brown sugar
1/2 cup white sugar
1/2 cup sour cream
1 tablespoon instant coffee powder
 
Combine ingredients in a saucepan and cook to the soft-ball stage.
Remove from heat and toss in: 3 cups broken walnuts.  Spread on wax-paper-lined cookie sheets to dry. The nuts should be fairly separate, not in large clumps.

Next, we have

 
ORANGE SUGARED PECANS
1 cup brown sugar, firmly packed
3 tablespoons evaporated milk
1 tablespoon butter
1 teaspoon freshly grated orange peel
2 cups pecan halves
 
In small heavy saucepan, combine the sugar and evaporated milk. Cook over medium heat to 234° (soft-ball stage), stirring occasionally. Add butter and orange peel; stir to blend. Add pecan halves; stir until all are coated. Spread the pecans on a cookie sheet lined with wax paper or parchment paper. When candy coating is firm, gently break pecans apart. Store in covered containers.

The first nut recipe is from Cook & Tell. The second is from a Taste of the Country cookbook. Both of these nut recipes make wonderful gifts. You can buy tins or jars to put them in, or, for a vintage look, save cans through the year from peanuts, mixed nuts or cashews and cover them with Christmas wrapping paper. That’s the old-timey way, and it's just what my Aunt Bessie always did!

Wednesday, December 19, 2018

December 19 -- the Wednesday Medley


Ah yes, Wednesday again, and time for the Wednesday Medley hosted by Terri at Your Friend from Florida!   Terri asks the questions and bloggers come up with their own answers.

 Wouldn't you like to join in also?  Just head over to Terri's blog, get the questions, then copy, paste, and answer them on your own blog.  Then you can go back to Terri's and link up (which I completely forgot to do last week!).   Here we go with the questions:

1.  Wednesday, December 19, 2018, is National Hard Candy Day! So the first question today is to ask if you enjoy hard candy, especially the kind we usually see during this festive time of year?  What is your favorite?  Which hard candy brings up the best memories for you if any?
 
I am not really a fan of hard candy except for the type which has a soft filling and even then, not really much of a fan.  A couple kinds bring up good memories though -- peach blossoms, little pillow shaped candies with a shiny peach colored coating and a soft peanut butter interior, always available on my grandmother's candy table, and Canada mints, which my grandfather always had in his pockets and would offer to me as a little child.  He died when I was four so that is one of my only memories of him.  

I also have great memories of the multicolored hard candies (some had little flowers on them as part of the candy) that used to be given out in candy boxes like the one below.  Sort of like an animal crackers box.

2.  Holiday shopping!  Are you finished? If you could spend an entire day in just one store, which one would it be and why?
 
I am not quite finished. Those who know me well would get a hearty laugh out of me spending an entire day shopping in just one store or even in a variety of stores.  A store I could spend quite a bit of time in, though, is a Christmas Tree Shop, because they have all kinds of different things that I would be interested in.  Just not all day.

3.  What holiday dessert describes you and why?
 
Good grief, what a question!   Okay,  this just occurred to me: how about pecan pie ... a little nutty, a bit crusty, but sweet at heart?

4.  What is your least favorite holiday side dish?
 
 Hmmm... Some people serve plain boiled onions (often, out of a jar!) at Thanksgiving -- and maybe Christmas too, for all I know.  They may be my least favorite.

No boiled onions here, I'm sure.  A favorite Christmas cookbook.
5.  Now be real!! There is one on almost every tree. What is the ugliest tree ornament you have ever seen?
 
That is a good question.  I really can't think of one right now, but I do remember some glittery papier-mache birds from my childhood.  They were pale blue and pale pink, and had a certain charm back then, but they didn't wear well.  They are now very ugly indeed.
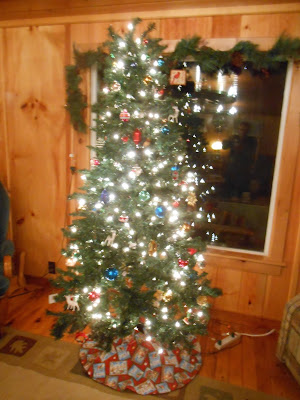
This year's Christmas tree -- maybe not quite finished
6.  Tell us something random about your week!!
 
I'm tickled to have all of my Nevada gifts en route -- some wrapped and sent by me, others going straight from Amazon.  It's quite an accomplishment and quite a bit ahead of my usual timing.

And that's a wrap for another Wednesday Medley!

Tuesday, December 18, 2018

December 18 -- A Christmas ornament exchange


This season, the lovely Stephanie at The Enchanting Rose invited her readers to participate in a Christmas ornament exchange.  Stephanie has often hosted teacup exchanges in the past but I have been hesitant to participate, fearing a teacup might get broken in the mail. 

So when I saw the ornament exchange, I thought it might be fun to take part.  Stephanie worked out all of the logistics for the 63 ladies who participated.  A registration type form helped her know about people's likes and dislikes and so on.  She emailed each of us with information concerning our swap partner, and gave detailed instructions, also:

1. This is an ornament swap so please send either a handmade, store-bought, or vintage Christmas ornament. Please make sure it's in nice condition with no breaks, tears, or wear.

2. Include a sweet little something with the ornament. It can be anything, my friends. Be creative and send something that is sure to bless the recipient's heart.

3. Please send a letter or card introducing yourself. Be friendly, share some fun Christmas traditions with your new friend.

4. Also, please send a "Thank You" card to the lady that sends to you. Remember, you are sending to someone and someone completely different is sending to you so you will make 2 friends during the swap.

5. Wrap everything well with bubble wrap and tissue paper. Please send your items in a sturdy box, and please make sure your goodies are shipped out by Saturday, December 1st. The sooner you send your package the better!

6. There will be a reveal post on my blog on Monday, December 17th. If you have a blog, please feel free to share your Christmas ornament on it and then link it up on my blog. If you don't have a blog than you can send me a picture of your swap goodies and I will share it on the reveal post.


If you check out Stephanie's reveal post, you will see that some ladies really went over the top with their gift-giving.  There seem to be many talented crafters among this group!

 The person who sent my package was Ashley.  I'll just share photos and captions.
The gift was packaged in this nice box with chalkboard label. 


Ashley had read on my blog that I enjoy sewing, so she sent me two pieces of pretty fabric.    It will be fun deciding what to use this for!
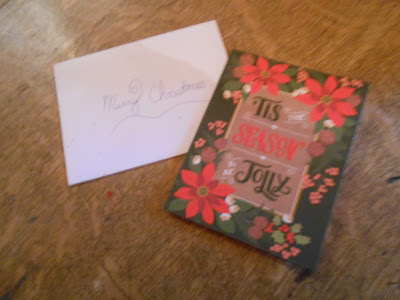
What a lovely Christmas card!
Ashley made this pretty ornament for me using sheet music. 
Tea bags (Lemon Lift is one of my favorites!); sticky notes and pen; and a lovely gold snowflake completed the gift.
Thanks again, Ashley, if you are reading this!  Your thank-you note is in the mail.

My package was sent to Susan.  Again I'll share photos and captions of what I sent to her.
A variety of handmade gift tags and a sparkly "S" for Susan (or perhaps for Sparkle!)
Susan likes blue, tartan, and plaids, so I used a blue Christmas card to write my introductory note.  The "Joy to the World" journaling card is by Jaime at Raising Up Rubies.
I sent 2 ornaments -- the gold sparkly heart made by a friend, and the cross stitch one made by me years ago.  I also included a glimmering acrylic tree which I found at Wal*Mart.  I liked that so much, I bought more for myself.
A handmade coaster with a blue fabric included and a mulled cider mix, both made by me
Lastly, Susan also mentioned liking chocolate, so I included a tiny box of chocolates and a teensy bag of Lindt truffles
I hope that Susan enjoyed her package as much as I did putting it together.  This was a fun experience for the Christmas season.  Thank you, Stephanie, for orchestrating this ornament exchange!