Thursday, December 15, 2011

Delights of December Day 15 ~ Peanut Butter Balls

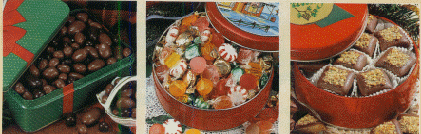
One of our family's favorite Christmas candies -- to eat and to give away -- is peanut butter balls. I have tried different recipes over the years and have narrowed it down to 2 recipes that I really like. The first one is my kids' favorite, and I really prefer the flavor of these too. The second one is much easier to make and more professional-looking. You might want to try them both and see which one your family prefers!

CHOCOLATE PEANUT BUTTER BALLS
 
1 cup butter or margarine
1 1/4 cups peanut butter
3 1/2 cups confectioners sugar
3 1/2 cups rice krispies cereal
1 cup chocolate chips
1/2 of an 8-ounce milk chocolate candy bar
A 2-inch square of paraffin wax, cut up
 
Melt butter in 2-quart heavy saucepan over low heat. Add peanut butter; stir until blended. Remove from heat.
 
Combine confectioners sugar and rice krispies in mixing bowl. Pour hot peanut butter mixture over all; mix thoroughly, using hands. Shape mixture into 1-inch balls. Place on wax paper-lined cookie sheet.  Cover and refrigerate 1 hour.
 
In top of double boiler, combine remaining ingredients. Place over simmering hot water until melted. Dip chilled peanut butter balls in chocolate mixture to coat. Return to wax paper-lined cookie sheets.
 
Chill until set. Store in covered tin in refrigerator. Makes about 6 dozen candies.

Now, I have what I think is the world’s best peanut butter ball recipe, and it’s not this one. This is the one I always used to make before finding my favorite. I think, however, that all of my kids prefer the
ones with the rice krispies. Below, though, is what I consider

THE BEST PEANUT BUTTER BALLS

2 c. confectioners sugar
2 Tblsp. butter, room temperature
1 Tblsp. milk
2 tsp. granulated sugar
1/2 tsp. vanilla
1/2 c. creamy peanut butter
1 c. chocolate OR vanilla chips
1 Tblsp. crisco
For decoration: colored sugar or candy sprinkles

In a medium bowl, mix the first 5 ingredients, using your hands or a mixer until blended. Mix in peanut butter.
 
Line a jelly-roll pan or cookie sheet with wax paper. Roll sugar mixture (about 1 heaping teaspoon each) into 3/4” balls. Place these on the lined pan. Chill at least 2 hours until firm.
 
Melt the chocolate and shortening together on the stovetop or in the microwave (my preference). One at a time, spear the peanut butter balls with a toothpick. Dip in melted chocolate; lift out and let the excess chocolate drip off. Return each dipped ball to the lined pan. Remove toothpick. Before chocolate sets up, sprinkle each ball with colored sugar or candy sprinkles.
 
Chill candy for 10-15 minutes to firm up chocolate. Remove from pan. Store airtight in refrigerator for up to 2 weeks. Makes 40.

These are to my mind the best and easiest peanut butter balls. I sent many of these in college care packages over the years!
Wednesday, December 14, 2011

Delights of December Day 14 ~ Easy ornaments to make

Two Easy Ornaments

Here are a couple of fun projects to do with children -- although I must admit I often have had fun making these and other ornaments all by myself!  First, we have:

Juice-Can Lid Ornaments

The supplies you will need are simple:

* Lids saved from cans of frozen juice/lemonade/iced tea (Lids should be washed and completely dry)

* Scraps of Christmas wrapping paper

* Pen or pencil

* Decorative holiday cords and trims (Walmart craft department is a great source for these)

* White glue

* Paintbrush

* Clear glitter (optional)

* Ribbon (optional)

* Thin gold cord, hot glue gun/sticks (to make hanging loop)

Place your lid on the wrapping paper and trace around it. Depending upon the pattern of the wrapping paper, you may want to center a motif in the circle you're making. Cut out the circle and glue it to the lid -- the outside of the lid, the side with a nice rim around it. Then use a paintbrush (I like to get the foam type for this) to paint a coat of glue over the picture as well. If you want your ornament to sparkle, this is the time to sprinkle on some glitter. Allow the glue to dry.

Take a piece of decorative cord or trim and glue it around the inside of the lid's rim. If you start at the top or bottom of your motif, you can very easily cover the spot where the ends of the cord meet with a small bow, ribbon rose, or whatever. (As mentioned, Walmart has many different such cords or trims available this time of the year. I have shiny red/gold cord, red/green, blue/silver, etc. I always buy these after Christmas when they are very inexpensive... but the full price is really quite reasonable. Another good source for such cord and trims is Home-Sew or Newark Dressmaker Supply.) Allow the glue to dry.

For the hanging loop, make a loop from the thin gold cord and knot the ends together. Use hot glue to glue the knot to the center top on the back of the juice can lid. Let dry and hang on your Christmas tree!

 
Second, you could try:

Foam Ball Ornaments

You need:

Foam balls -- either styrofoam or a smooth foam (my pick) -- 2-inch diameter or less

Scraps of Christmas wrapping paper

Mod Podge

Foam paint brush

Glitter (optional)

Straight pins

Glue

Gold (or another color) cord for hanging

Narrow ribbon (optional) in colors that coordinate with your wrapping paper

I saw some balls similar to these years ago at a Christmas shop. I decided to figure out how to make them.

Make a hanging loop with gold or another color of cord. Knot the loop. Dip a straight pin in glue and push the pin through the knot and then into the foam ball.


Next, cut or tear your wrapping paper scraps to a size that will fit around the ball you are using. (Each ball should be made with only one design of wrapping paper.) Coat the ball with Mod Podge. Adhere the wrapping paper to the ball until it looks the way you want it to. Paint the entire ball with a coat of Mod Podge.

Now, you will need to find a way to hang your ornaments until the Mod Podge dries. I used a wooden spoon with the spoon part weighted down on a table and the handle extending out to hang the ornaments from. It might also work to pin them to a clothesline, if you have one in a protected place.

When the Mod Podge is dry, add another coat. Repeat until the ball looks the way you want it to. If you like, sprinkle glitter over the final coat of Mod Podge. You may also like to make a coordinating small bow out of narrow ribbon and glue it to the top of the ball when the Mod Podge dries.

When the ornaments are completely dry, hang them on your Christmas tree!

(I don't know if there are other people out there who love Christmas wrapping paper as much as I do, but we tend to save even our smallest scraps and wrap the stocking presents in them. Some papers I just hate to say goodbye to, they are so pretty. These ornaments provide an opportunity to keep some of your favorite papers indefinitely.)

Have fun with these ideas!


Tuesday, December 13, 2011

Gooseberry Patch cookbook giveaway at Faithfulness Farm!


Here's a fun giveaway from Gail at  Faithfulness Farm!  She is giving away a new Gooseberry Patch cookbook, Rush Hour Recipes, along with a Faithfulness Farm apron and tea towel combo with a cute chicken motif.  She also shares several yummy-sounding recipes from the book and shows mouth-watering photos of the same.  These recipes would make a wonderful meal for guests this Christmas season.  To get in on the giveaway, head over to Rush  Hour Recipes Giveaway and find out how to enter!

Delights of December Day 13 ~ more festive fudge!


Here is one more fudge recipe for your enjoyment.

SPECIAL HOLIDAY FUDGE

1 1/3 cups sugar
1 1/3 cups miniature marshmallows
1/4 cup butter or margarine (1/2 stick)
2/3 cup evaporated milk
1/4 tsp. salt
1 tsp. orange extract
1/2 tsp. almond extract
12 ounces semisweet chocolate chips
1 cup raisins
1 cup chopped pecans

In large heavy saucepan, combine first 5 ingredients. Bring to a boil over medium high heat. Boil 5 minutes, stirring with a wire whisk.  Remove from heat, stir in chips until melted. Stir in the extracts and
then the nuts and raisins. Replace your whisk with a spoon and beat by hand until glossy, 30 to 60 seconds. If needed, you may add up to 2 Tblsp. water to make it glossy, but you probably won't need to. Turn into a buttered 11 x 7” or 9 x 12” pan. Cool completely, then cut in squares.

This fudge is absolutely wonderful! It really tastes like Christmas!  I found the recipe many years ago in my favorite cooking newsletter, 
Cook & Tell , and have made it nearly every Christmas since then.
If you have a nostalgic fondness for Chunky® candy bars or chocolate-covered raisins, you are sure to enjoy this fudge.

Monday, December 12, 2011

Delights of December Day 12 ~ Festive Fudge!


At our house, it wouldn't be Christmas without a couple of kinds of fudge. This one is our all-time favorite.

HEAVENLY DELIGHT
1 cup peanut butter chips
1 cup semisweet chocolate chips
2 1/2 cups sugar
7-ounce jar marshmallow fluff
3/4 cup evaporated milk
1/4 cup butter (1/2 stick)
1 tsp. vanilla

Line an 8-inch square pan with foil, extending the foil over the edges of the pan. Measure the peanut butter chips into a small bowl, and measure the chocolate chips into a second small bowl. Set aside.
 
In a heavy 3-quart saucepan, combine the sugar, fluff, evaporated milk, and butter. Cook over medium heat, stirring constantly, until the mixture boils. Boil and stir 5 minutes. Remove from the heat and stir in the vanilla.

Immediately pour half of the hot mixture into the peanut butter chips.  Stir until the chips are completely melted and incorporated into the hot mixture. Quickly pour the peanut butter mixture into the prepared pan.

Stir the remaining hot mixture into the chocolate chips until they melt and are completely blended in. Quickly spread this mixture over the peanut butter layer.

Cool the fudge completely before removing it from the pan. Lift the fudge out of the pan by the foil, put it face down on a plastic cutting board and peel off the foil. Cut the fudge into 1” pieces.

This terrific recipe is from Cook & Tell. Its actual name is “Double-Decker Peanut Butter Fudge”. But when Esther, my daughters’ college roommate and friend, tasted this, she promptly named it “Heavenly Delight”. And so it has been, ever since.

Sunday, December 11, 2011

Delights of December Day 11 ~ a lovely decorating idea!


Here's one of my favorite decorating ideas -- a candlelit stairway. It's a really lovely way to make your home extra welcoming for guests on a cold winter evening. It's especially nice if (like us) you aren't blessed with having a fireplace in your home. It conveys the same welcome flickering warmth.

Here's what I do: I place a votive candle in a glass holder on every other step of my staircase. I may set each one on a paper doily -- or, in autumn, a leaf; at Valentine's Day, a heart-shaped red doily, etc. It doesn't matter if the votive holders match one another -- I use a whole assortment of clear glass holders -- but they should be glass and not opaque to get the best effect. (Red or green glass holders would also be pretty.) For candles, sometimes I use all white or ivory ones. Other times I alternate red and green. For autumn, I would use fall colors, and for Valentine's I either use red or alternate red and white.

When your guests are due to arrive, quickly light each candle. Fireplace matches work very well for this, since you can light several candles with the same long match.

This is such a simple, easy thing to do, but guests enjoy it so much! I have had many people comment on how pretty and welcoming the lighted staircase looks.

Saturday, December 10, 2011

Delights of December Day 10 ~ Macaroon Kiss Cookies


Here's another of my favorite Christmas cookies. I don't make these every year, but they are so pretty and unusual that they add a lovely note to a cookie tray.

MACAROON KISS COOKIES
1/3 cup butter, softened
  1 pkg. (3 oz.) cream cheese, softened
3/4 cup sugar
1 egg yolk
2 tsp. almond extract
2 tsp. orange juice
1 1/4 cups flour
2 tsp. baking powder
1/4 tsp. salt 
 5 cups flaked coconut, divided 
9 oz. Hershey milk chocolate kisses, unwrapped (about 54)

Cream butter, cream cheese and sugar together until light and fluffy. Add egg yolk, extract, and orange juice; beat well. Sift together the flour, baking powder and salt; gradually add to creamed mixture until well blended. Stir in 3 cups coconut. Cover dough and chill it for about 1 hour.

Shape the dough in 1” balls. Roll balls in remaining coconut; place on ungreased cookie sheet. Bake at 350° for 10 to 12 minutes or until lightly browned on bottom. Remove from oven and press a chocolate kiss into the center of each cookie. Cool 1 minute on cookie sheet, then carefully remove to racks to cool until chocolate is firm. Makes 4 1/2 dozen.

I found this recipe many years ago in an old Early American Life magazine being discarded by the library.  These cookies are delicious and very festive-looking.