
I shared this on my Christmas blog --
Mrs. T's Christmas Kitchen -- a few years ago, but have never posted the actual how-tos here at my kitchen table. I thought since it's December, and people are trimming their trees and homes, some little bits and pieces might come to light that would be perfect for a project like this. I just got my shadow box out for the season, and was delighted all over again to display it. So if this looks like your type of project, read on. What follows is not exactly a tutorial, but rather basic instructions that might work with whatever memorabilia you choose to use.
For
the longest time I had wanted to make a Christmas shadow box
using vintage odds and ends. I had seen the idea in
Gooseberry Patch
Christmas Book 7, and loved the one they showed. The directions were by
necessity not super specific, because of course what everyone chooses for a shadow box
frame and bits of memorabilia will be different.
I
wanted to use an old red wooden silverware tray as a shadow box frame.
This was my mother's, and was used by me as a teenager when I had a
little home baking business. In recent years, nearly every time I
opened the silverware drawer in my own kitchen, I would be reminded of this
project and how much I wanted to create one of these shadow boxes. So one day I got my materials together and set out to make one. It took
me a week or more, because I was working on it in available snippets of time here and
there. It would likely take only a few hours for most people. I began by thoroughly cleaning and washing the tray.
 |
| Then
I lined the compartments with scrapbook paper. I had some I had bought
years ago specifically for this project. I thought the red plaid had a
vintage look -- but oh, aren't those red and green prints amazing?
They look like scans of actual vintage fabric. There are stains, worn
places, etc. Just the look I was going for! |
 |
| Another look with the tray flat, just as I glued the paper in. I used a glue gun for the entire project. |
 |
| After
lining the bottom of each compartment, I remembered something
important. One side of each compartment was going to become the shelf
for the memorabilia. So I needed to line those as well. |
 |
Then the fun began! I started with the vertical side compartment.
 |
I
was a bit at a loss trying to decide how to fill this longer vertical
space. I finally decided to make a tag and hang it from a red
thumbtack. The picture is of me and my brother and a cousin in the snow.
The flocked Santa sticker, the plastic holly and the striped bias tape
are all vintage.
 |
A closer look at the tag and its vintage Santa sticker, holly, berries and bias tape.
 |
The
lower end of the tall side compartment needed something to fill in below the tag. I used vintage plastic greens, holly,
and berries. This was old stuff from my great-aunt. Tiny vintage
glass Christmas balls, too.
Then I set about filling the compartments. This was pure fun -- but I
found that it did need careful placement. There was one mistake I made by doing this, which you will eventually see below. I set everything in place
while the frame was laid down flat and made sure I liked the effect
before gluing anything down. |
|
|
|
 |
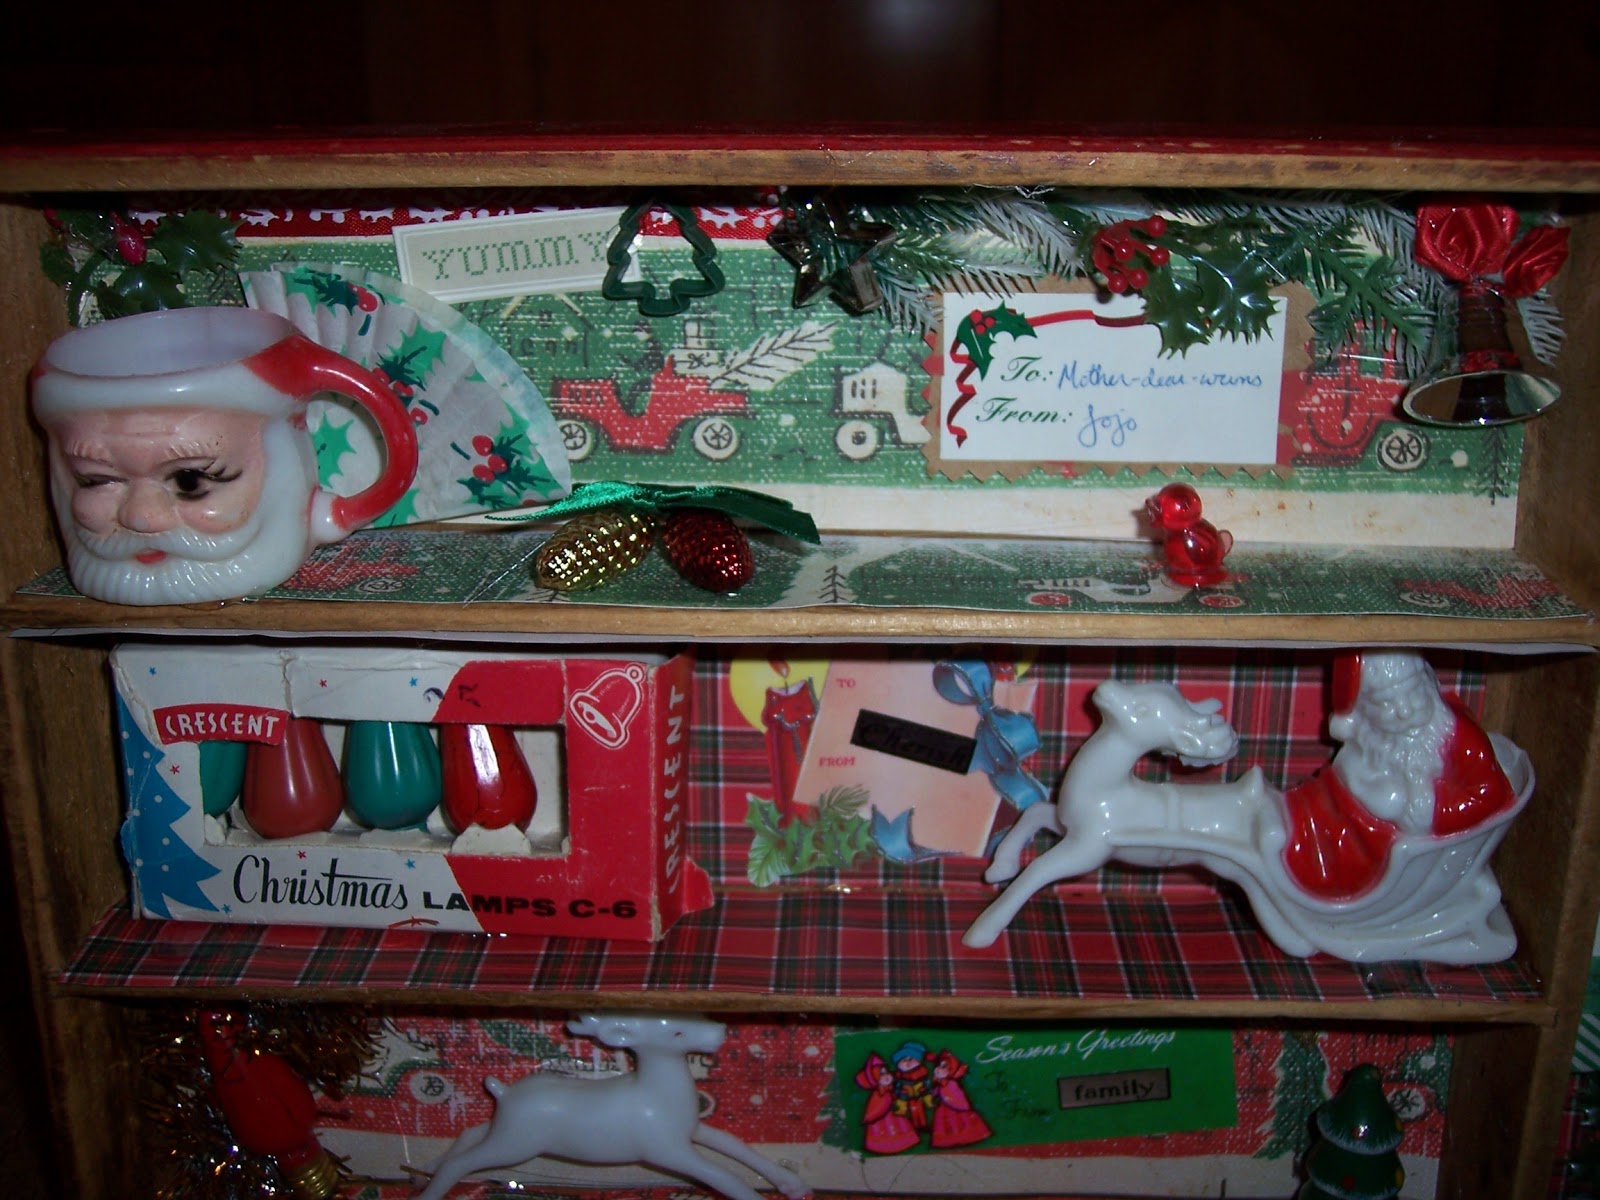
| The
top shelf holds lots of memories. When I was a child my grandmother
had Santa mugs that the grandchildren were allowed to use at Christmas
dinner. The one here is a cheap miniature plastic imitation, but looks much the
same. The folded cupcake paper (which I may or may not leave there) is
from a stash of my grandmother's Christmas things. The tag is from my
daughter as a teen, and the ribbon roses are a reminder of her as well
since she often called herself the "little rose girl". (She loves
roses!) The red ribbon, plastic greenery, the bell, and the little red
bird are vintage. The cookie cutter shapes are new but I thought they
went well with the other things. |
|
|
 |
| The
second shelf holds a box of vintage light bulbs, a vintage sticker tag
and a vintage plastic Santa and sleigh. I stuck a little metal
embellishment that says "Cherish" on the tag. The little metal pieces
don't show up well in the photo, but they look cute in the shadow box in
person. |
 |
| The
letter stickers and the word on the tag are newer items. You can't
really see the word but it says "family" and is a shiny silver color.
In retrospect I should have put the "memories" letters lower on the back
wall. (This was the only downside to arranging everything flat to check placement; it skewed my view of things at what would be the top of each compartment.) It is fine when the shadow box is hung on a wall, but is a
bit hard to see in the photo. |
 |
| Vintage plastic deer, light bulb and tinsel from one of our early Christmases together. |
 |
| Finished shadow box! |
Hope you have enjoyed this look at the making of a Christmas shadow box! Maybe you've been inspired to make one of your own!
I am linking up today with Sandi's
No Place Like Home at Rose Chintz Cottage. You'll find loads of inspiration over there, so do visit!


I always meant to make a shadow box and never did. Your easy instructions would come in handy. Thank you for sharing and I appreciate all the vintage touches.
ReplyDeleteChristmas blessings,
Sandi
Now that's cute! You're so right...there are many things that could be used from the Christmas boxes. A wooden utensil holder would work for the tray part...maybe...
ReplyDeleteWhat a fun project! I just love the idea of making a shadow box using an old wooden utensil tray! I imagine this would be a wonderful project to make for many different things, such as a graduation gift, a family heirloom box, and much more! I know you and your family will enjoy looking at this special box that you created over the holidays!
ReplyDeleteHi ladies! I'm so happy to see all of you here!
ReplyDeleteSandi, I hope you do make a shadow box and can then display it on one of your blogs.
Vee, yes, isn't it funny? It seems there are always little odds and ends in the bottom of the Christmas boxes. That's where I found some of the little things I used.
SpicingUpIdaho -- I am so happy to see you back from your blogging break. Glad you liked my shadow box project. You're right, it would be a fun project for many occasions.