Showing posts with label chocolate. Show all posts

Wednesday, June 05, 2024

A very special cookie for all of your Spring and Summer events


Last Wednesday evening my Nevada daughter messaged me on Instagram to ask about this recipe.  Her young daughter had a piano recital coming up and Joanna wanted to make these cookies to add to the refreshments at the recital.  

It's so appropriate!  Decades ago,  I made these cookies for the piano recitals of all three children. They were a great favorite on the refreshment table! In fact, they became such a favorite of the kids' piano teacher that I frequently presented her with a tin of these as an end-of-the year gift. These cookies are quite a bit of work, but the impressively delicious results are worth it!


The recipe (which I originally found in a Farm Journal cookie cookbook) ended up being published in another cookbook, The Wellesley Cookie Exchange Cookbook. This came about in an interesting way.  


Our children's piano teacher was an elderly lady with many students.  One of the families whose children took lessons from her lived in a large and beautiful home and they offered their music room, complete with baby grand piano, as a recital venue.  

I wanted to bring cookies as elegant as the surroundings, so I tried this recipe.  And the hostess enjoyed them so much that she asked if she could have the recipe.  Friends of hers held an annual cookie exchange and she thought these cookies were special enough to share.  Later when Yankee published the cookbook, this wonderful recipe was included.

 SPRITZ CHOCOLATE SANDWICHES

1 cup butter or margarine, softened
1 1/4 cups confectioners' sugar
1 egg
1 tsp. vanilla
2 1/2 cups flour
1/2 tsp. salt

Buttery Chocolate Frosting:
3 Tblsp. butter, softened
4 1/2 Tblsp. unsweetened baking cocoa
3/4 tsp. vanilla
Dash of salt
3 1/2 cups confectioners' sugar
About 6 Tblsp. light cream or evaporated milk

1 cup chopped walnuts

For dough, beat butter until light; gradually add sugar, beating after each addition. Beat until light and fluffy. Beat in egg and vanilla to blend well. Sift together flour and salt; gradually add to creamed
mixture, mixing well.

Put star plate in cookie press. Working with one-fourth of the dough in the press at a time, press out strips of dough about 2 1/2 inches long about an inch apart on an ungreased cookie sheet.

Bake at 400° for 6 to 8 minutes or until very delicately browned.  Remove cookies to cooling rack at once.

For Buttery Chocolate Frosting,
combine the butter and cocoa. Beat in vanilla, salt, sugar, and enough light cream to make frosting of spreading consistency. When cookies are cool, put them together in pairs with frosting between. Dip ends of sandwiches in the frosting and then in the chopped nuts. Allow frosting to set before packaging or storing cookies. Makes about 5 dozen sandwich cookies.

A note on the quantity of cookies this recipe will produce.  The original recipe says it makes 69 sandwich cookies.  I had adjusted it to say 5 dozen, which would of course be 60 sandwich cookies.  However, when Joanna made these, she found she only got about 30 sandwich cookies (2 1/2 dozen).  So when making these, be aware that the quantity of cookies can vary greatly depending upon how large you make them.  

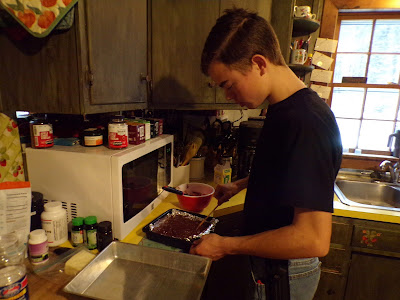
Jerusha  about to press cookies

Finished product!

It's so much fun that these cookies are being served at a second generation of piano recitals!
Tuesday, December 21, 2021

Two more of the candy recipes we used


 I had promised to share recipes from our candy-making day with the grandkids.  Over on my Christmas blog, I have shared the links to recipes for Creamsicle Fudge and Rocky Road Fudge.  I will share the links for the other two candy recipes here at my kitchen table today.

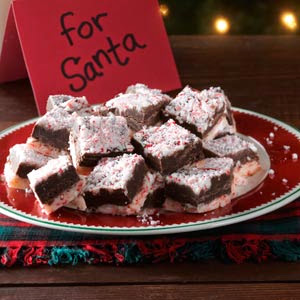
One is the Candy Cane Fudge.  You see Sam preparing the first layer of it above.  It's the type you make in the microwave, using chocolate chips and sweetened condensed milk,  which makes it relatively fast and easy.  (Of course, if you don't have a microwave or prefer not to use one, the melting steps can easily be done using a saucepan on the stovetop.)  Unfortunately, I misread the recipe and thought it called for 1 cup of crushed candy canes in each layer, rather than a total of 1 cup.  You sprinkle half in the bottom of the square pan before adding the chocolate layer, and mix the rest into the white portion for the top layer.  

 We also failed to find the mini candy canes the recipe calls for and thought it would be no problem to use the large ones.  But Sam (who is incredibly strong) found it quite a task to crush the larger candy canes and ended up doing so out on the porch using a hammer!

All in all, though, in spite of my mistakes and missteps, this candy turned out well   It seemed a little too sticky at first (and that could have been due to using too much crushed candy), but after it set in the fridge for awhile, all was well.  Here's what it looks like (Taste of Home photo):

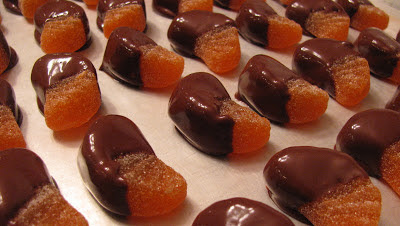
And then the last candy we made was Chocolate Dipped Orange Slices.  This has become a huge favorite among our family and friends, and is so easy!  You just melt chocolate chips and then dip the orange slice candies (the ones at our supermarket are naturally flavored!) in the melted chocolate and place them on waxed paper to harden.  I use dark chocolate chips to make them really good.  Julia made these and I failed to get any photos of the process.


There you have it!  I hope to try one more fudge recipe this week, but we will see.

Sunday, December 15, 2019

A little festive progress


Life is crazy indeed these days.  Just a little festive progress being made, including these yummy cookies pictured above.  Mr. T used the recipe for Chocolate Butter Cookies and turned them into Sacher Torte cookies by filling them with jam (some apricot, some cherry) and topping with chocolate.

He also made a batch of Heavenly Delight this past week when he got out of work early one day.  It was delicious and we've already given some as gifts, so he needs to make another batch soon.

As mentioned earlier, I made Chocolate Orange Cookies for a cookie swap on Thursday.  They went over very well, and I've had a couple requests for the recipe.  I'd forgotten to add the chocolate chips when preparing the dough, so made half of the cookies with the chips and half without.  I think I liked them better without the chocolate chips, but many others liked them with the chips included. 

Yesterday was a very busy day which included a dump run, a bit of shopping at the Dollar Tree, cleaning the church, cookie baking, and supper with our young friends Sam and Jennifer (breakfast for dinner -- we love that!๐Ÿ˜‹).

Today, Sunday, has been equally busy.  We both taught Sunday School -- then a church from a neighboring town brought their kids and young people to present a Christmas musical for us in the 10 a.m. service.  Four of our grandkids were involved with this and it was great fun.  They would be presenting it in their own church in the afternoon.  Following the musical, folks from both churches enjoyed a nice soup and bread luncheon downstairs in the fellowship hall.  It was wonderful that their pastor had the idea of presenting the musical at our church as well.  When people go to that much work practicing for such an event, it's fantastic to be able to present it more than once.

After lunch we enjoyed our annual gift exchange at church.  (We draw names.)  That was fun also.  Mr. T received some cozy-looking socks and lots of chocolate.  I received a pretty tree-shaped candle and a generous gift card for Hobby Lobby.  

After that, a handful of us -- two ladies, three men, two college age men and two guitars -- went to a few houses and sang Christmas carols.  (A number of folks had other commitments.)  It seemed a bit surreal to be singing Christmas carols standing in mud, looking at green lawns and enjoying temperatures in the 40s.  There was, however, plenty of brisk wind and even the odd snow shower to give it atmosphere.

Yes, a busy day.  If time allows, we may take four local grands on our annual Christmas shopping trip tomorrow. 
It's been a tradition with three of them for years, but little sister (now 5) may be deemed big enough to come along.  We will see.  And that (whenever it happens) will be another busy day!

Thursday, December 12, 2019

Trying a new cookie recipe


So tonight I'm hosting a cookie swap here at my home for friends from church and anyone else they may invite.  As before (I did this a couple of years ago), I'm keeping it pretty low-key and relaxed.  No competition or anything, just a fun time to visit, eat yummy appetizers, sip mulled cider and cranberry juice, and exchange some cookies.  In addition to bringing a specified number of cookies, I'm asking each lady to bring along a "sweet thought": a memory, story, testimony or favorite Scripture to share.  It should be fun.

Photo from Ice Cream Inspiration
I found this recipe for Chocolate Orange Cookies on Pinterest back in 2016, and immediately pinned it to my Christmas Cookie Exchange! board.   I'm only now getting around to trying the recipe.

The flavors of chocolate and orange together are so festive!  They bring to mind those nifty chocolate oranges that are to be unwrapped and eaten a wedge at a time.  And these yummy chocolate dipped orange smiles that I make each Christmas and that are so delightful on cookie trays.
 
So yesterday I baked these cookies.   I was interrupted in the mixing of the dough and forgot about adding in the chocolate chips.  I had baked about half the cookies when I remembered.  So I used half the amount of chocolate chips and mixed them in with the remaining dough.  I will let the ladies at the swap decide which they think is better!

Monday, October 28, 2019

Choco-Marshmallow Cookies

 
Last Thursday I took some time to bake cookies.  I would have guessed that I had posted this cookie recipe a long time ago, but it doesn't seem to be here, so I'm posting it now.  The Kindle photo above shows these cookies being packaged in a tin, which is only right, as you will see if you read on.

This is an old favorite that I often made years ago.  When my daughters were at boarding school in the 1990s, I routinely sent tins of cookies back to school with them after the weekend.  These cookies seemed necessary to get them and their friends through the week.  There were a number of different types of cookies that I baked, and this is one of the recipes that I used.

One friend of Carrie's, in particular, loved these chocolate cookies with a marshmallow half hidden under frosting,  and so from time to time I would make them just for her.

Here's the recipe:

CHOCO-MARSHMALLOW COOKIES
1 3/4 cups flour
1/2 cup unsweetened baking cocoa
1/2 tsp. baking soda
1/2 tsp salt
1/2 cup shortening -- I used butter flavor Crisco®, but I'm sure you could use butter
1 cup sugar
1 egg
1 tsp. vanilla
1/2 cup milk
Chopped walnuts if you like -- I never use them
18 regular marshmallows cut in half horizontally
Cocoa Frosting (recipe follows)

Sift together flour, cocoa, baking soda and salt; set aside.

Cream together shortening and sugar in bowl until light and fluffy, using electric mixer at medium speed.  Add egg and vanilla, beating well.

Add dry ingredients alternately with milk to creamed mixture, beating well after each addition.  Add 1/2 cup chopped walnuts if you are using them. 

Drop mixture by teaspoonfuls, about 2 inches apart, on parchment-lined baking sheets.  Bake in 350ยบ oven for 10 minutes.  Top each with a marshmallow half, cut side down.  Return to oven for 2 minutes.

Let cool slightly before transferring cookies to cooling racks. 

When completely cooled, frost with Cocoa Frosting, swirling frosting to cover the marshmallow.  Makes about 3 dozen.

COCOA FROSTING
2 cups confectioners sugar
1/3 cup unsweetened baking cocoa
Dash of salt
3 Tblsp.melted butter
4 Tblsp. cream or milk
1/2 tsp. vanilla

Sift sugar, cocoa and salt into mixing bowl.  Add remaining ingredients and mix until smooth and creamy.

A couple of notes:
* I used Bob's Red Mill 1-to-1 Gluten Free Baking Flour in these most recently.
* I doubled the recipe, but found I did not need to double the frosting amount.

This recipe was one I originally found in Farm Journal's Choice Chocolate Recipes --  a favorite cookbook and well used.  Its pages are liberally spattered with chocolate, and whole sections have come loose from the book.  Are you familiar with Farm Journal cookbooks?  I loved them and own quite a few of them.

Hope your family enjoys these cookies if you try the recipe!

Monday, March 18, 2019

Weekend baking report: Chocolate Chai Tea Loaf and more


Photo from Taste of Home
This Sunday it was my turn to provide the snacks for our coffee break at church.  I made several baked items in addition to taking cheese and crackers and a large container of fresh strawberries.

All of the baked goods went over well, but this Chocolate Chai Tea Loaf was absolutely amazing.  Thankfully I had left one smaller loaf at home!

I made just a couple of tiny changes in this recipe which is linked above.  Instead of 2 ounces of chopped semisweet chocolate, I just used 2 ounces (1/3 cup) of semisweet chocolate chips because it was simpler.  Also -- the chai latte tea mix (Oregon Chai)  I used came in packets, so I measured it by the tablespoon right from the packet.  When it came to the frosting, the recipe called for only 1 tablespoon, but there was more than that left in the package -- nearly another tablespoon, I would say.  I just used it all in the frosting rather than have a small amount left in the packet.  No doubt it gave the frosting a more pronounced flavor of tea and spices, but it was delicious!  Also, I made this recipe gluten free by means of the Bob's Red Mill 1-to-1 gluten free baking flour.
Although I carefully measured my loaf pans to be sure they were the size called for in the recipe, I still ended up with batter left over, so I used another, smaller loaf pan for the extras.  If you didn't have one, you could probably make a couple of muffins with the excess batter.
๐Ÿ“๐Ÿ“๐Ÿ“
Since yesterday was St. Patrick's Day, I also took along a pan of Gluten Free Irish Soda Bread which also went over very well.  It goes over well at home, so I was pretty sure people at church would also enjoy it.  This recipe doesn't rise as high as traditional Irish soda bread, but it has a rugged rustic look.
๐Ÿ“๐Ÿ“๐Ÿ“
And then lastly I made a pan of very simple Cheese Danish.  Here is what you need for this recipe:

SIMPLE CHEESE DANISH SQUARES
2 cans crescent roll dough
12 ounces cream cheese, softened
1 cup sugar
1 teaspoon vanilla
1/4 cup melted butter
Cinnamon-sugar for the top

Unroll 1 can of the crescent rolls and press into the bottom of an ungreased 13x9 pan.  Press carefully to seal all of the perforations.

In a bowl combine the cream cheese, sugar, and vanilla.  A beater will work but using a wooden spoon works just as well.  Spread the cream cheese over the dough in the pan.

Open the second can of crescent rolls and arrange the dough over the top.  Seal perforations if you can, but you don't have to get too finicky about it.

Spread the melted butter over the top as evenly as you can, then sprinkle liberally with cinnamon-sugar.  Bake at 350ยบ for 25 to 30 minutes.

These always go over well.  I have a perfectly wonderful recipe for traditional Cheese Danish pastries (find it here: Cheese Danish) but it is a lot of work.  I may make those for Easter, but for just an ordinary Sunday the quick recipe works fine.

And that was my weekend baking!  You might enjoy trying these recipes, too.

Monday, December 17, 2018

December 17 -- Festive fudge!

 
At our house, it wouldn't be Christmas without a couple of kinds of fudge. This one is our all-time favorite.

HEAVENLY DELIGHT
1 cup peanut butter chips
1 cup semisweet chocolate chips
2 1/2 cups sugar
7-ounce jar marshmallow fluff
3/4 cup evaporated milk
1/4 cup butter (1/2 stick)
1 tsp. vanilla

Line an 8-inch square pan with foil, extending the foil over the edges of the pan. Measure the peanut butter chips into a small bowl, and measure the chocolate chips into a second small bowl. Set aside.
 
In a heavy 3-quart saucepan, combine the sugar, fluff, evaporated milk, and butter. Cook over medium heat, stirring constantly, until the mixture boils. Boil and stir 5 minutes. Remove from the heat and stir in the vanilla.

Immediately pour half of the hot mixture into the peanut butter chips.  Stir until the chips are completely melted and incorporated into the hot mixture. Quickly pour the peanut butter mixture into the prepared pan.

Stir the remaining hot mixture into the chocolate chips until they melt and are completely blended in. Quickly spread this mixture over the peanut butter layer.

Cool the fudge completely before removing it from the pan. Lift the fudge out of the pan by the foil, put it face down on a plastic cutting board and peel off the foil. Cut the fudge into 1” pieces.

This terrific recipe is from an old favorite cooking newsletter, Cook & Tell, no longer in publication.  The actual name of this candy is “Double-Decker Peanut Butter Fudge”. But when Esther, my daughters’ college roommate and friend, tasted this, she promptly named it “Heavenly Delight”. And so it has been, ever since.

Saturday, December 15, 2018

December 15 --Two simple but fancy-looking Christmas cookie ideas


Here are two great tried-and-true Christmas cookie ideas which are much easier than they look.  These cookies are easy but very pretty and fancy looking.  The first one starts with a baked pan of brownies.  My mother (who invented these as far as I know) always used the brownie recipe from the Betty Crocker Cookbook, but certainly it will work with any brownie recipe or even a brownie mix. 

The second idea is one I heard on Gus Saunders' Yankee Kitchen radio program, which I often listened to years ago.  Someone called in this idea, which uses purchased fig bars, and I tried it.  Delicious, pretty, and almost no work.


Both of these will make your cookie plates look fancy with very little work on your part:
1) Poinsettia Brownies

My mother always made these to add to her gift trays of cookies at Christmas. Bake brownies as usual and let them cool. Before cutting, frost the brownies with a simple white butter frosting and mark them into squares. Using slices of candied cherries (note: NOT maraschino cherries, which could make quite a mess), form poinsettias on the top of each square. Cut the brownies along the marked lines. You can make this even simpler by using brownie mix and canned frosting.
 
It just occurred to me today that it would be cute to use the two-bite brownies to make these.  I think I'll pick up a package, along with some candied cherries, and give it a try.
2) Fancy Fig Cookies
These start with purchased fig bars (like Fig Newtons®). Cut the bars in half lengthwise to make sticks, or in half diagonally to make triangles. Dip the pieces in melted chocolate, then in chopped nuts. Place on foil-lined baking sheets and chill until chocolate is set.

Enjoy!

Thursday, December 13, 2018

December 13 -- Sacher Torte Cookies


Here is another of our favorite Christmas cookies. This recipe also has appeared on my blogs numerous times, but for those who are new I really must share it again.  I've made these cookies each Christmas for well over 30 years and it would just not seem like Christmas without them.  One of my daughters likes these so much that I give her some for Christmas each year on a special new holiday plate or in a special holiday tin.

SACHER TORTE COOKIES

1 cup butter, softened
1 (4 1/2 oz.) pkg. instant chocolate pudding mix
1 egg
1 teaspoon almond extract
2 cups flour
3 tablespoons sugar
1/2 cup apricot (or raspberry) jam
1/2 cup chocolate chips
3 tablespoons melted butter

Heat oven to 325°. 


In a large mixing bowl, combine butter and pudding mix; cream together until fluffy. Beat in egg and extract. 

Gradually add flour, beating at low speed with mixer until dough forms. Shape dough into 1” balls. Dip balls in sugar. Place 2” apart on ungreased cookie sheets. With your thumb, make an imprint in center of each ball. 

Bake for 15 to 18 minutes or until cookies are firm; remove from sheets immediately to wire racks to cool. When cookies are cool, fill each indentation with about 1/2 teaspoon jam. In a small saucepan, or in microwave, blend chips and butter over low heat until chocolate melts, stirring constantly. Drizzle about 1/2 teaspoon chocolate over each cookie.

Yield: About 4 dozen cookies.


(Some people prefer not to use instant pudding mix.  I have found that the Land'O'Lakes recipe for chocolate butter cookies works perfectly for the cookie part of this, with no instant pudding mix needed.  You can find the recipe here: Chocolate Butter Cookies.  I've used this a number of times when I was out of pudding mix, and think I almost like it better!)
 

These cookies look pretty and fancy but are very easy to make. I believe I found the recipe in a Yankee magazine article about the Wellesley Cookie Exchange.

Tuesday, February 27, 2018

One more slow cooker dessert: Hot Fudge Sundae Cake


Photo from Taste of Home
Probably a good many of us have made a hot fudge sundae cake (also called a hot fudge pudding cake) in the oven.  It used to be a very popular dessert in the 1960s and 1970s and I had several other variations of it.  A lemon one, a caramel apple one, and a toffee raisin one.  All were good, but I think the hot fudge one was the favorite of most people.

Once I realized that my newly acquired 3-quart slow cooker was the perfect size for desserts, I decided to try the hot fudge sundae cake from my Gooseberry Patch Slow Cooking All Year Round cookbook. 

Here is  the recipe:
HOT FUDGE SUNDAE CAKE
1 cup flour*
1/2 cup sugar
6 Tblsp. unsweetened baking cocoa, divided use
2 tsp. baking powder
1/2 tsp. salt
1/2 cup milk*
2 Tblsp. vegetable oil
1 tsp. vanilla
3/4 cup brown sugar, packed
1 1/2 cups hot water

Spray a 2 to 3-quart slow cooker with non-stick baking spray.  Sift flour, sugar, 2 Tblsp. baking cocoa, baking powder and salt into a mixing bowl.  Stir in the milk, oil, and vanilla.  Spread this batter evenly in the greased slow cooker.

In a small bowl, stir together the brown sugar and the remaining 4 Tblsp. baking cocoa.  Slowly stir the hot water until smooth.  Pour this mixture evenly over the batter in the slow cooker.  Do not stir!

Cover slow cooker and cook on High setting for 2 to 2 1/2 hours, or until a toothpick inserted in center comes out clean.  Turn off slow cooker.  Let cake stand, uncovered, for 30 to 40 minutes before serving. 

Spoon warm cake into dessert dishes; add ice cream if desired.  Spoon sauce from slow cooker over top.  Makes 6 to 8 servings.

(The recipe also called for 1/2 cup chopped nuts, but I don't think they are necessary.  If you use them, fold them into the batter just before spreading it in the cooker.)

* When I made this, I used the Bob's Red Mill Gluten Free 1-to-1 baking flour.  I also used almond milk instead of regular milk.

Oh, my, is this delicious!  I've made it twice now for our potluck lunch at church.  The second time I doubled the recipe and again, used the 3-quart slow cooker.  It worked fine.  Both times, I had French vanilla ice cream available to serve with this.  Coffee ice cream would also be fantastic!

To take this to the potluck, since I was going to be at church all morning anyway, I just cooked it there.  I spread the batter in the slow cooker and did not do the rest of the prep until I got to church.  I had the brown sugar and cocoa combined in a covered plastic bowl and just stirred in the hot water when I got there, then poured it over the batter.

And I just realized that -- although I followed the directions to turn the cooker off and let stand 30-40 minutes before serving, I didn't take the cover off.  It didn't seem to do any harm, but I'll pay attention to that next time!

If your family or potluck crowd likes chocolate and you like the idea of a nice warm dessert without any last-minute fuss, give this one a try!

Tuesday, February 14, 2017

A few last-minute Valentine sweets


Happy Valentine's Day, everyone!

I'm going to share some Valentine sweets with you today, things quick and easy enough to make at the last minute.  But first, something even sweeter.  Stephanie, over at The Enchanting Rose, has written a beautiful post on The Love of God.  If you haven't seen this post, do go on over and read it.  Stephanie's words, the hymns and poems she shares, and her gorgeous, evocative photography will warm your heart today.

For the more temporal sweetness, now, a few candy recipes and a deep-chocolate dessert!  I'll start with the dessert since you might like to make this for after supper tonight:
Photo from Taste of Home

DOUBLE CHOCOLATE TORTE

1 package fudge brownie mix (13x9-inch size) plus the eggs, oil and water it calls for
1 cup semisweet chocolate chips, melted
1/2 cup butter or margarine, softened

2 cups whipped topping (or, by all means use real whipped cream if you have it)
Chocolate or heart-shaped sprinkles

Prepare brownie mix as package directs for fudge-like brownies. Spread batter in a greased & floured 9-inch round cake pan. (Or do as I do and don’t bother with greasing & flouring -- just place a 9-inch round of wax paper in the bottom of the cake pan.) Bake at 350ยบ for 38-42 minutes or until center springs back when lightly touched. Cool for 10 minutes.

Invert onto a serving plate and cool completely. In a bowl, stir together the chocolate and butter until smooth. Spread over brownie layer; refrigerate for 30 minutes.

Just before serving, top with the whipped topping. Decorate with sprinkles.

Yield: 9-12 servings.

This recipe is so easy and takes such ordinary ingredients, yet produces something really special! You might already have all of the ingredients on hand. It is decadent, for sure. I found this recipe in an early Quick Cooking magazine.

Now just a few simple candy recipes.

Photo from Taste of Home
Angel Food Candy melts in your mouth and is so delicious!  I've had this recipe for years and years.
Photo from Taste of Home
Coffee Shop Fudge is one that I made at Christmas.  It's a lot like Arlene’s Easy Fudge, only with coffee and a touch of cinnamon.  Either one is a quick fudge that you can probably have in the pan in under five minutes.
Photo from Taste of Home
Peanut Butter Balls are a long-time favorite in our family, and maybe in yours too.  If you coat them in white chocolate and add some Valentine sprinkles or red sugar, you will have a festive treat indeed!  This is probably the most time-consuming recipe of the bunch, since it takes time to form the candies and dip them in melted chocolate, not to mention chilling time.
Photo from Taste of Home
Heavenly Delight is a tradition in our family.  Just a double decker chocolate and peanut butter fudge, it is easy and relatively quick to make.
Photo from Taste of Home
Chocolate-Covered Almond Brittle is a delicious candy I've made many times.  It's made in the microwave so it's quite easy, but beware!  The bowl or casserole dish you're cooking the brittle mixture in will get VERY hot.  I once destroyed a glass bowl cooking this mixture.  I recommend a Pyrex casserole to microwave it in.
Photo of full-size chocolate pizza from Taste of Home
And then last but not least, not at all, are Little Chocolate Pizzas.  The recipe is for a large chocolate pizza, but it is much more fun if you make them individual size.

Well, I could go on and on, but I will stop here.  Among these, I'd say you're sure to find a sweet treat that your sweethearts will enjoy!

Wednesday, March 09, 2016

Chocolate, chocolate, and chocolate!


Photo from Pixabay
Have you heard the saying (I'm sure you have!) "Chocolate is the answer; who cares what the question is?"  Some days are like that!  Lately I've tried a few good chocolate recipes and have been intending to post about them for awhile.  So, here goes!

I'll start with a simple mint brownie recipe.  Last spring we found the Winter Toll House baking morsels from Nestle's on clearance at Wal*Mart at a greatly reduced price.  If memory serves they were maybe 39¢.  These are simply a swirled dark chocolate and mint morsel.  They work well in place of Andes mints in my Chocolate Mint Crisps that I always make at Christmas.

I recently found a couple more bags of these morsels in my pantry and was trying to think of a way to use them in a bar cookie.  I recalled that my favorite brownie recipe calls for a cup of chocolate chips, which I often omit.  Why not use a cup of winter morsels instead, I wondered?  These turned out to be so delicious that the remaining morsels will go, one cup at a time, into brownies.

Here is the recipe, in case you're interested:

The brownie recipe is the best I’ve ever had. It came originally from my pastor’s wife, and I still want to give her credit for this great recipe even though I’ve changed a couple of things.

THE PASTOR’S WIFE’S BROWNIES
1 cup flour
2/3 cup baking cocoa
1/2 teaspoon baking powder
1/4 teaspoon salt
3/4 cup canola oil
2 scant cups sugar (I used about 1 1/3 cup)
3 eggs
2 teaspoons vanilla

Sift together the flour, cocoa, baking powder and salt. Set aside. In a mixing bowl beat together the remaining ingredients. Sift in the flour mixture and stir it in thoroughly. (Here is where to add your 1 cup of winter morsels or chocolate chips if you like.) Scrape into a greased 13x9” pan. Bake at 350 for 25 minutes or just until done. Don’t overbake or you’ll lose the fudgy texture.

Photo from Inside BruCrew Life
The next recipe I tried was Moose Tracks Cookies from Jocelyn at Inside BruCrew Life.  These include lovely ingredients like white chocolate morsels and chopped peanut butter cups.  I happened to have both on hand and wanted to use them up, so this was a good use.  Don't be surprised, but the recipe calls for only 1/4 cup of flour.  And yes, that actually works.  I did refrigerate the dough for awhile before baking it, and I also kept it in the fridge when I wasn't actually working with it. 

I rolled the dough into balls because that is just my preference when baking cookies. Because of this, my cookies were rounder and less flat, but I'm sure they were no less delicious.
My cookies -- blurry photo taken with the Kindle
Lastly but certainly not least is the Cocoa Dreams  recipe from my blog friend Vee.  Oh, are these ever good!  (I doubled the recipe and used a 13x 9 pan.)  A nice shortbread layer is the base, and then there is a gooey chocolate layer.  You top with buttercream frosting and chopped walnuts.  These bars are indeed the stuff that chocolate dreams are made of.  Here are a couple of Kindle photos:
They are rich, so I cut them very small.
Better view of the cocoa layer
I had seen a recipe for buttercream frosting with marshmallow fluff in it and wanted to try it.  But when I found it, it was a huge recipe, intended for frosting and decorating a layer cake.  So I went looking through my old Cook & Tells and found the perfect one.  I cut the recipe in half for this and it worked admirably.  Here's that recipe as I made it, with the ingredients halved:

VANILLA BUTTERCREAM FROSTING

1 stick butter, softened
About 1 cup of marshmallow fluff or creme
1/2 cup confectioners' sugar
1/2 tsp. vanilla

Beat the softened butter with an electric mixer on medium speed till creamy.  Beat in fluff until well blended.  Beat in the sugar and vanilla.  Increase the mixer speed to high and beat 3 to 4 minutes, till fluffy.  Makes about a cup and a half of frosting.  

Since both bars and frosting are rich, I thought this frosting layer didn't need to be overly thick.  This was just right.

I will share just one more recipe since it's been on my mind (and my palate) lately.  I've made this old favorite Chocolate Pudding for One several times as a meal (!) since having a wisdom tooth extracted last week. 
Photo from Taste of Home
This winter when Toll House baking morsels were on sale for weeks for 2/$4 at our local supermarket, I bought bag after bag of the dark chocolate variety for my pantry once I tried them and found out how wonderful they are.  I've been using those in the chocolate pudding recipe and oh, is it delicious.

In the mood for chocolate?  Give one of these delicious recipes a try.

Thursday, December 15, 2011

Delights of December Day 15 ~ Peanut Butter Balls

One of our family's favorite Christmas candies -- to eat and to give away -- is peanut butter balls. I have tried different recipes over the years and have narrowed it down to 2 recipes that I really like. The first one is my kids' favorite, and I really prefer the flavor of these too. The second one is much easier to make and more professional-looking. You might want to try them both and see which one your family prefers!

CHOCOLATE PEANUT BUTTER BALLS
 
1 cup butter or margarine
1 1/4 cups peanut butter
3 1/2 cups confectioners sugar
3 1/2 cups rice krispies cereal
1 cup chocolate chips
1/2 of an 8-ounce milk chocolate candy bar
A 2-inch square of paraffin wax, cut up
 
Melt butter in 2-quart heavy saucepan over low heat. Add peanut butter; stir until blended. Remove from heat.
 
Combine confectioners sugar and rice krispies in mixing bowl. Pour hot peanut butter mixture over all; mix thoroughly, using hands. Shape mixture into 1-inch balls. Place on wax paper-lined cookie sheet.  Cover and refrigerate 1 hour.
 
In top of double boiler, combine remaining ingredients. Place over simmering hot water until melted. Dip chilled peanut butter balls in chocolate mixture to coat. Return to wax paper-lined cookie sheets.
 
Chill until set. Store in covered tin in refrigerator. Makes about 6 dozen candies.

Now, I have what I think is the world’s best peanut butter ball recipe, and it’s not this one. This is the one I always used to make before finding my favorite. I think, however, that all of my kids prefer the
ones with the rice krispies. Below, though, is what I consider

THE BEST PEANUT BUTTER BALLS

2 c. confectioners sugar
2 Tblsp. butter, room temperature
1 Tblsp. milk
2 tsp. granulated sugar
1/2 tsp. vanilla
1/2 c. creamy peanut butter
1 c. chocolate OR vanilla chips
1 Tblsp. crisco
For decoration: colored sugar or candy sprinkles

In a medium bowl, mix the first 5 ingredients, using your hands or a mixer until blended. Mix in peanut butter.
 
Line a jelly-roll pan or cookie sheet with wax paper. Roll sugar mixture (about 1 heaping teaspoon each) into 3/4” balls. Place these on the lined pan. Chill at least 2 hours until firm.
 
Melt the chocolate and shortening together on the stovetop or in the microwave (my preference). One at a time, spear the peanut butter balls with a toothpick. Dip in melted chocolate; lift out and let the excess chocolate drip off. Return each dipped ball to the lined pan. Remove toothpick. Before chocolate sets up, sprinkle each ball with colored sugar or candy sprinkles.
 
Chill candy for 10-15 minutes to firm up chocolate. Remove from pan. Store airtight in refrigerator for up to 2 weeks. Makes 40.

These are to my mind the best and easiest peanut butter balls. I sent many of these in college care packages over the years!

Tuesday, December 13, 2011

Delights of December Day 13 ~ more festive fudge!


Here is one more fudge recipe for your enjoyment.

SPECIAL HOLIDAY FUDGE

1 1/3 cups sugar
1 1/3 cups miniature marshmallows
1/4 cup butter or margarine (1/2 stick)
2/3 cup evaporated milk
1/4 tsp. salt
1 tsp. orange extract
1/2 tsp. almond extract
12 ounces semisweet chocolate chips
1 cup raisins
1 cup chopped pecans

In large heavy saucepan, combine first 5 ingredients. Bring to a boil over medium high heat. Boil 5 minutes, stirring with a wire whisk.  Remove from heat, stir in chips until melted. Stir in the extracts and
then the nuts and raisins. Replace your whisk with a spoon and beat by hand until glossy, 30 to 60 seconds. If needed, you may add up to 2 Tblsp. water to make it glossy, but you probably won't need to. Turn into a buttered 11 x 7” or 9 x 12” pan. Cool completely, then cut in squares.

This fudge is absolutely wonderful! It really tastes like Christmas!  I found the recipe many years ago in my favorite cooking newsletter, 
Cook & Tell , and have made it nearly every Christmas since then.
If you have a nostalgic fondness for Chunky® candy bars or chocolate-covered raisins, you are sure to enjoy this fudge.

Monday, December 12, 2011

Delights of December Day 12 ~ Festive Fudge!


At our house, it wouldn't be Christmas without a couple of kinds of fudge. This one is our all-time favorite.

HEAVENLY DELIGHT
1 cup peanut butter chips
1 cup semisweet chocolate chips
2 1/2 cups sugar
7-ounce jar marshmallow fluff
3/4 cup evaporated milk
1/4 cup butter (1/2 stick)
1 tsp. vanilla

Line an 8-inch square pan with foil, extending the foil over the edges of the pan. Measure the peanut butter chips into a small bowl, and measure the chocolate chips into a second small bowl. Set aside.
 
In a heavy 3-quart saucepan, combine the sugar, fluff, evaporated milk, and butter. Cook over medium heat, stirring constantly, until the mixture boils. Boil and stir 5 minutes. Remove from the heat and stir in the vanilla.

Immediately pour half of the hot mixture into the peanut butter chips.  Stir until the chips are completely melted and incorporated into the hot mixture. Quickly pour the peanut butter mixture into the prepared pan.

Stir the remaining hot mixture into the chocolate chips until they melt and are completely blended in. Quickly spread this mixture over the peanut butter layer.

Cool the fudge completely before removing it from the pan. Lift the fudge out of the pan by the foil, put it face down on a plastic cutting board and peel off the foil. Cut the fudge into 1” pieces.

This terrific recipe is from Cook & Tell. Its actual name is “Double-Decker Peanut Butter Fudge”. But when Esther, my daughters’ college roommate and friend, tasted this, she promptly named it “Heavenly Delight”. And so it has been, ever since.

Thursday, April 21, 2011

Homemade chocolate Easter eggs


Peanut Butter Eggs
(Photo by Taste of Home)

Chocolate Eggs
(Photo by Taste of Home)

For those who may be interested in making their own homemade chocolate Easter eggs, I have a couple of fun links to share. I made these eggs with two of my granddaughters last Easter, and have been waiting all this time to share this post.

Both recipes may be found at the Taste of Home site: First, a recipe for Peanut Butter Easter Eggs; and second, a recipe for Chocolate Easter Eggs. Both kinds are dipped in chocolate and may be decorated with frosting and/or sprinkles.

Here are the finished centers:

We dipped them in almond bark,

melted,

and trimmed with sprinkles.
The dipping process:
Chef M.

Two chefs:

The sprinkling process:

The finished eggs:

Hope your family enjoys these wonderful chocolate eggs if you try either recipe!