Showing posts with label recipes. Show all posts

Friday, March 27, 2026

Trying something new: Date Bark


I recently tried what I guess has become somewhat of an internet sensation: date bark.  I'd seen it on Instagram and I think the idea is it's supposed to taste like a snickers bar.  I say not quite, but it is delicious.

I found the recipe in the Home section of The Epoch Times newspaper around the end of February, but it took me awhile to get around to trying it.  You can read the article (and find the recipe) here: Date Bark.  

Essentially, you take 12 Medjool dates and remove the pits.  You arrange the dates, edges touching, in a 3x4 grid in the center of a square of parchment or wax paper and place another piece of the same over the top.  Then you use a rolling pin to roll out the dates, between the sheets of parchment or wax paper to an even 1/8-inch thickness.  Transfer the dates, still between the sheets of paper, to a rimmed baking sheet.

Then you remove the top piece of parchment and spread nut butter (I used natural peanut butter) over the date layer, spreading it to the very edge.  Then you melt 3 to 3 1/2 ounces of dark or milk chocolate (or 1/2 cup chocolate chips) with 1 teaspoon coconut oil.  (I used about 1 1/2 ounces of bittersweet chocolate and 2 Tablespoons dark chocolate chips along with the coconut oil.)  Pour the melted chocolate into the center of the nut butter layer and spread out from there to the edges, covering the nut butter completely.

Chill the date bark at least an hour before cutting into small pieces.  As you can see by my "squares" below, it isn't super easy to cut.  If you can wait longer than an hour that's probably better. 

Store airtight in the refrigerator in between layers of wax paper.

And there you have my late-to-the-party take on the "viral" date bark.  It's very good and is a nice thing to keep in the refrigerator for when you just want something chocolate. 

Thursday, January 08, 2026

From the January archives

 I guess that I have never done an archive post for January.  I can't find it, if so.  So it's high time that I put one together!  It's also an easy sort of post to buy me a little time while formulating my New Year goals.   Pour yourself a cup of coffee or tea (isn't this snowflake coffee pot beautiful?)  and enjoy the read.

I'll start by sharing Cranberry Orange Muffins, from January 2007.  As I mentioned in the post, this muffin recipe includes cornmeal and I really like the texture.

From 2008, When the Path is Steep is a devotional thought that might encourage anyone facing what looks like a hard season.

January 2009 had so many posts to help with spiritual growth.  I will share just two: Reading Through the Bible in a Year or more, and Enriching one's life by use of a Prayer Journal.  I think I need to update that Bible reading post (or write a new one) since I've discovered other great ways of reading through the Bible in the interim.  If you are interested in the others -- there are more posts about my prayer journal and quiet time -- just go to the archives for January 2009.

In 2011 I did a number of embroidered designs, mostly pillow cases and dish towels.  You can read about them here: Bluebird and Sparrow designs.  And Hearty fare for a cold night features Rosemary Chicken with White Beans.  

Vintage Style Pillowcases, from 2012, is a pattern I have made often.  So customizable!

A post about three cross-stitched Christmas ornaments might give you some ideas for the coming year's Christmas crafting.  From 2015.  Further crafting from that same January included a flannel baby blanket which has become my go-to baby gift.  New moms love the convenient size of these blankets to place over baby in the car, or to use as a handy nursing cover.

From 2016, I share some ideas for Winter Centerpieces.

This post could become quite unwieldy, as I have nine more years of archives to look through.  So I will end with this and plan to do a second archive post later in the month.


Tuesday, April 08, 2025

For National Coffee Cake Day ...


Photo is from Faithfully Gluten Free
 
Yes, who knew?  Yesterday, April 7, was apparently National Coffee Cake Day!   

It's a neat fact to know because we love coffeecake in this house and would be happy for a reason to celebrate. 

One practice I've been developing in recent years is the technique of turning muffin recipes into coffee cakes.  Muffins are great and we do enjoy them, but as I age I am finding it more and more trouble to spoon batter into tins or paper muffin cups.  Inevitably there are spills on the rims of the tins which need to be wiped off or they will burn.  

So I've begun working on ways to adapt muffins to coffeecakes.  Sometimes it can be done with no changes at all to the recipe proportions; other times the quantities need to be increased or at least tweaked a bit.

Years ago in Nevada we greatly enjoyed some maple apple muffins we trted at a favorite coffee shop,  We learned that these muffins were not baked in-house, but had been purchased at Costco,  One year we even bought a dozen to take home with us and a plastic box to carry them in so they could be safely stashed under the seat in the airplane.

After a bit of searching I found a muffin recipe on AllRecipes.com that tasted very much like our old favorite, and I baked them fairly often.  

Recently I got to wondering if I could turn this maple apple muffin recipe into a coffeecake.  My hubby, fast becoming the resident baker, was game to try.  This is what we ended up with:

Maple Drizzled Apple Coffeecake

1 3/4 cups flour (a bit more if you think it needs it)

1 1/3 cup quick oats

1 cup sugar

4 teaspoons baking powder 

2 teaspoons cinnamon

1/2 teaspoon salt

3/4 cup milk

1/2 cup melted butter

1/3 cup maple syrup 

2 eggs, lightly beaten

2 1/2 cups chopped peeled apples 

Chopped pecans if desired

Glaze:

1/2 cup confectioners sugar

2 1/2 Tablespoons maple syrup 

In a large bowl, combine flour, oats, sugar, baking powder, cinnamon and salt.  In a small bowl, mix milk, butter, syrup, and eggs; stir into dry ingredients just until moistened.  Fold in apples.  Spread batter in a greased 13 x 9 pan; sprinkle with chopped pecans if desired.  Bake at 375ยบ for 45 to 60 minutes or until a toothpick comes out clean.

Cool in pan on a wire rack.  When completely cooled, combine the glaze ingredients in a small bowl and drizzle over the coffee cake.

We did add the additional 1/4 cup flour as we thought it needed it.  However, the coffee cake was a bit crumbly, so maybe another time we would add only 2 additional tablespoons.

The coffeecake might not be quite as yummy as the original muffins, but it is tasty and we have even brought it along for coffee breaks this week for the volunteer work crew!

So Happy National Coffee Cake Day to you all!  If you'd like to celebrate, even a day or two late, this just might be your recipe.

Thursday, December 12, 2024

Festive Appetizer Spread -- a versatile recipe


Some time ago I winnowed out the hundreds of scribbled down or clipped out recipes I had stashed here and there in my kitchen and cookbooks.  I found places to file them, sorted some to sell on Etsy, and ended up with a large envelope of them that I didn't quite know what to do with.  I couldn't seem to make up my mind whether to keep them or throw them away.  That's the envelope, above.

While planning for Christmas in July on my Christmas blog, I decided to pull out a recipe from this envelope, planning that I would pick the first one I came to that sounded the least bit Christmasy!  Living dangerously.   And I did end up with one that sounded really good: Cranberry Cream Pie. 

I decided then and there that I'd be doing the same thing during December Daily, on both blogs.  So recently I plucked another recipe from the envelope, and out came Festive Appetizer Spread.  This looks so good!

 Essentially, this is a homemade whole cranberry sauce made with fresh cranberries, apricot preserves, and almonds.  

After cooling, the sauce is then spooned atop a block of cream cheese and served with crackers.  

 
The sauce is so versatile because it may also be served as an accompaniment to pork or poultry.  One could get a lot of mileage out of this recipe over the holiday season, using it as part of a festive appetizer buffet or as an accompaniment to a pork roast, chicken, or turkey.  

I'm definitely going to be trying this recipe.  How about you?

Monday, October 28, 2024

Easiest kid-friendly macaroni and cheese


Image by Steve Buissinne via Pixabay

 Recently my friend Jennifer and her three young boys came for lunch.  We're trying to make this a biweekly thing, so I've been considering kid-friendly menus for the very young -- say, five and under.  For last Friday, I wanted to make macaroni and cheese, along with hot dogs.  

I nearly always make baked macaroni and cheese and top it with either bread crumbs and grated cheddar, or (my preferred way, and the way my mother always did it) with saltine cracker crumbs browned in a generous amount of butter.  But somehow, I thought unbaked macaroni and cheese, unadorned with anything crunchy, might be the way to go for little kids.  A little more like Kraft Dinner, only much better.

So I went hunting for a Quick Macaroni & Cheese recipe I used to use quite a bit back in the day.  It called for processed cheese (I'd forgotten that) and I wanted to use real cheddar.  So I adapted the recipe quite a bit and I also doubled it.  I was really pleased with the result.  Nice and creamy, and everyone enjoyed it.

Our friends were arriving at 11 to allow for an hour of play time before lunch.  So even though this is a last-minute type recipe with no baking required, I didn't want to be preparing it at the last minute.  So I started my prep at around 10:30 and, when it was done, I popped the mac'n'cheese into a slow cooker and set it on Low until  time to eat.  I skipped the paprika on top to avoid picky eaters saying they "didn't like" that red stuff. But for adults, yes, I would add a sprinkle of it, maybe even smoked paprika.

Here's the recipe:

Easiest Kid-Friendly Macaroni and Cheese

1 pound elbow macaroni
1/2 cup butter
1/2 cup flour
3 cups milk
1 to 2 Tblsp. instant minced onion
3 cups shredded cheddar cheese (12 ounces)
2 teaspoons parsley flakes (optional)
1 teaspoon salt
1/4 teaspoon pepper
Paprika (optional)

Cook the elbow macaroni as directed on package.

Meanwhile, melt the butter in a large saucepan.  Add the flour, stirring constantly, and cook until bubbly.  Remove from heat and gradually add the milk and the minced onion,, stirring constantly until all is well mixed.  Return the saucepan to the heat and cook, stirring constantly.  When it comes to a boil, continue to cook and stir for one minute or until sauce is nice and thick.  Add the cheese about a half cup at a time, stirring until cheese is melted and blends into the sauce.  Add the salt and pepper and the parsley flakes if using.

Drain the cooked macaroni well and combine with the cheese sauce in a large serving dish.  (Or, if making this an hour or two ahead, place it in a greased crock pot set on Low to keep warm.)  Sprinkle with paprika before serving if desired.  Makes 6 to 8 servings.  

Wednesday, June 05, 2024

A very special cookie for all of your Spring and Summer events


Last Wednesday evening my Nevada daughter messaged me on Instagram to ask about this recipe.  Her young daughter had a piano recital coming up and Joanna wanted to make these cookies to add to the refreshments at the recital.  

It's so appropriate!  Decades ago,  I made these cookies for the piano recitals of all three children. They were a great favorite on the refreshment table! In fact, they became such a favorite of the kids' piano teacher that I frequently presented her with a tin of these as an end-of-the year gift. These cookies are quite a bit of work, but the impressively delicious results are worth it!


The recipe (which I originally found in a Farm Journal cookie cookbook) ended up being published in another cookbook, The Wellesley Cookie Exchange Cookbook. This came about in an interesting way.  


Our children's piano teacher was an elderly lady with many students.  One of the families whose children took lessons from her lived in a large and beautiful home and they offered their music room, complete with baby grand piano, as a recital venue.  

I wanted to bring cookies as elegant as the surroundings, so I tried this recipe.  And the hostess enjoyed them so much that she asked if she could have the recipe.  Friends of hers held an annual cookie exchange and she thought these cookies were special enough to share.  Later when Yankee published the cookbook, this wonderful recipe was included.

 SPRITZ CHOCOLATE SANDWICHES

1 cup butter or margarine, softened
1 1/4 cups confectioners' sugar
1 egg
1 tsp. vanilla
2 1/2 cups flour
1/2 tsp. salt

Buttery Chocolate Frosting:
3 Tblsp. butter, softened
4 1/2 Tblsp. unsweetened baking cocoa
3/4 tsp. vanilla
Dash of salt
3 1/2 cups confectioners' sugar
About 6 Tblsp. light cream or evaporated milk

1 cup chopped walnuts

For dough, beat butter until light; gradually add sugar, beating after each addition. Beat until light and fluffy. Beat in egg and vanilla to blend well. Sift together flour and salt; gradually add to creamed
mixture, mixing well.

Put star plate in cookie press. Working with one-fourth of the dough in the press at a time, press out strips of dough about 2 1/2 inches long about an inch apart on an ungreased cookie sheet.

Bake at 400° for 6 to 8 minutes or until very delicately browned.  Remove cookies to cooling rack at once.

For Buttery Chocolate Frosting,
combine the butter and cocoa. Beat in vanilla, salt, sugar, and enough light cream to make frosting of spreading consistency. When cookies are cool, put them together in pairs with frosting between. Dip ends of sandwiches in the frosting and then in the chopped nuts. Allow frosting to set before packaging or storing cookies. Makes about 5 dozen sandwich cookies.

A note on the quantity of cookies this recipe will produce.  The original recipe says it makes 69 sandwich cookies.  I had adjusted it to say 5 dozen, which would of course be 60 sandwich cookies.  However, when Joanna made these, she found she only got about 30 sandwich cookies (2 1/2 dozen).  So when making these, be aware that the quantity of cookies can vary greatly depending upon how large you make them.  

Jerusha  about to press cookies

Finished product!

It's so much fun that these cookies are being served at a second generation of piano recitals!

Friday, April 19, 2024

Italian Sweet Bread


I used to make this recipe a lot back in the day.  For most of my life I've liked to bake some type of yeast bread or quick bread (like biscuits or cornbread) to accompany soups.  For the past couple of years and trying to eat more low carb, I've gotten away from that.  

A couple of weeks ago, though, I was preparing a birthday meal for my daughter -- lasagna and salad, and wanted a homemade bread to accompany it.  I just wasn't in the mood to make focaccia bread, which might be my usual go-to.  But then I remembered this Italian Sweet Bread -- which isn't actually very sweet, as it contains only 1/4 cup of sugar.  I remembered it as being quite easy, and it makes two loaves, which is a definite plus when one is feeding teen grandchildren with hearty appetites!

The only problem was that this recipe uses a bread machine to make the dough, and I no longer own one.  So I decided to tweak it and see if I could make it work with a more traditional method.  Here's what I did, and thankfully it worked.

ITALIAN SWEET BREAD

3/4 cup warm water
1 Tblsp. active dry yeast
1 Tblsp. sugar
2 Tblsp. butter, softened
1 egg, lightly beaten
3 Tblsp. sugar
1/4 cup cream
1 tsp. salt
3 cups flour

 In a small bowl, combine the warm water, yeast, and 1 Tblsp. sugar.  Stir well and let stand 5 minutes until bubbly.  Stir in the butter.

In a large bowl, beat the egg.  Stir in the 3 Tblsp. sugar, the cream, and salt.  When well blended stir in the yeast mixture.  Stir well and then add the flour.  You may need a little more flour to make it less sticky.  Turn dough out on a floured surface.  Let rest while you clean the bowl and grease it. Knead the dough a few times and form into a ball.  Place in the greased bowl, turning to grease the top of the dough ball, then cover with plastic wrap.  Let rise until doubled in bulk, about 50 to 60 minutes.

Then punch down the dough and return to the floured surface.  Cut the ball of dough in half and shape each half into a ball.  Flatten slightly and place each half into a greased 8-inch or 9-inch round pan.  Cover pans with plastic wrap and let rise until doubled, about 45 minutes.  

Recipe calls for brushing an egg wash (1 beaten egg/1 Tblsp. water) on top of the loaves before sprinkling on some Italian seasoning and baking.  I didn't want to go to that trouble, so I brushed on some cream instead.   Then I sprinkled lightly with Italian seasoning.

Bake the loaves at 350ยบ for 20-25 minutes or until loaves are golden brown.  Remove from pans to wire racks to cool.  Makes 2 loaves, 3/4 pound each.  Photo shows the loaf cut in slices, but we chose to cut ours in wedges.  

This bread went over big at the birthday dinner!


Wednesday, April 17, 2024

Answering just two


Vintage Thinking of You card sold in my Etsy shop

 No time for a long post today, and some of the Hodgepodge questions would have taken much more thought than I am capable of at the moment.  So I picked just two of the questions that I could answer quickly and easily.  Here goes:

2. Do you have a special place or organizational system for gift wrapping? Do you still buy 'real' cards to send for birthdays, anniversaries, get-well, etc? 

I keep most gift wrap, ribbon, tags, etc.  in two under-the-bed storage totes.  Everyday gift wrap for birthdays and such is in one tote. and Christmas gift wrap in the other, larger one.  I also have some smaller gift bags in each tote -- and the one with the Christmas wrappings also contains some packaging for kitchen gifts -- food-safe tissue paper, foldable cookie boxes, cookie bags, and the like.

Oh, and yes, I do still buy "real" greeting cards to send for birthdays and other occasions.  Often birthdays sneak up on me so I will resort to an e-card, but I try to keep get-well and thinking-of-you cards on hand at all times.  I will either buy them at the dollar store (where they are only 50¢!) , at Christianbook.com or sometimes at our local thrift store.  I also like to keep blank note cards on hand for writing notes of encouragement to folks.

3. It's National Banana Day...are you a fan? What's your favorite thing to make with bananas or, if you're not a cook, your favorite thing to eat that contains banana? 

I do like bananas but they need to be fairly green.  I've eaten very few bananas in the past 18 months or so, since I try to watch carbs quite carefully.  Probably my favorite way to eat bananas would be in a banana split.  

As for baking, I like to make banana coffeecakes or muffins more than banana bread.  I'll link to a couple of favorite recipes for you.

 This Banana Split Coffee Cake is from Jocelyn at Inside BruCrew Life.  I've never been disappointed in one of Jocelyn's recipes.  I leave the glaze off this one as it's sweet enough without it.

And this Banana Crunch Cake found in an old cookbook is really tasty too!

It's a gorgeous spring day here though just a little cool still.  Have a wonderful Wednesday, all!

Saturday, April 06, 2024

Random thoughts on a Saturday


Beautiful graphic by Abby at Little Birdie Blessings

 Just a few minutes to blog today so I will just share a few random things.  

๐ŸŒฟ  I wanted to share the carrot recipe I used on Easter.  I changed it a lot and can't now remember where I found it, but will share it as I made it.

ORANGE-MAPLE GLAZED CARROTS

1 1/3 cup orange juice (I purchased a small bottle of the fresh squeezed juice from the supermarket), divided use
2 pounds baby carrots
1/3 cup maple syrup
Freshly grated nutmeg
1/3 cup butter
2 Tablespoons cornstarch

Place 1/3 cup of the orange juice in a small bowl or custard cup and set aside.

Pour remaining 1 cup of orange juice into a medium saucepan and heat to boiling.  Add the carrots and stir to coat with juice.  Cover and cook for 15 minutes or so.  Stir in the maple syrup, freshly grated nutmeg to taste (recipe called for 1 teaspoon, but I wasn't sure how the kids would go for it, so I used probably 1/2 teaspoon or a little less), and the butter.  Stir until butter melts; cook, uncovered for another 10 minutes or so, or until nearly tender.  

Mix the cornstarch into the reserved orange juice; mix well and stir into the carrot mixture.  Cook, stirring, until mixture thickens somewhat.  If you think you'd like it thicker, mix up some more cornstarch in a little water or juice and add that.  (The cornstarch was my addition as I didn't think the carrots could be described as "glazed" at all.  Just carrots cooked in orange juice.)

Makes about 6 to 8 servings.  We thought they had a very nice flavor and made a good side for Easter dinner.

 ๐ŸŒฟ  Just looked at a writing prompt for today.  One was to list 5 things blooming in their garden.  Sadly, my garden is under inches of snow.  Possibly some shoots are up, like bloodroot or maybe even daffodils.  But they are not visible.

๐ŸŒฟ  I'm getting back into making kombucha.  So far, so good!  

๐ŸŒฟ Cleaning the attic is proceeding apace!  We try to do a little bit every week and think we are a little over half done.   We are doing this by bringing boxes down a section at a time, and going through them in the living room where it's warmer and more roomy.  The stuff we save! I believe my hubby said that almost everything left up there still to go through is in plastic totes, so that will be a lot easier.  The cardboard boxes we've been going through have been such a mess.  Mice have really had their way up there for years.

Several of the local grands had been planning to help us with this project (and they may yet get in on it, or on the garage attic when we do that) but I am really just as glad they were quite busy with other things the past few weeks.  Dealing with mouse nests and food caches is just messy.

๐ŸŒฟ  I finally finished the study Stand Firm, the Daily Grace Co. study on the armor of God.  What a blessing!  I think I will start their study on the book of Habakkuk next.


๐ŸŒฟ For those who are thinking something looks a little different with my blog, apparently The Cutest Blog on the Block, where I had obtained the blog background I'd had for years, is no more.  I can't tell you how shocked I was, at the end of a volunteer work day on Tuesday, to find the backgrounds missing from both of my blogs, and The Cutest Blog on the Block domain name apparently available for the taking.  

What to do?  I liked those backgrounds a whole lot!  The next day I did a little looking around and I am moderately pleased with what I found for my Christmas blog, but I'm not really crazy about the one for my Kitchen Table.  It will do for now, however.

All right, back to the kitchen!  Our local daughter had a birthday yesterday, and we are celebrating with supper this evening. 

Saturday, June 17, 2023

A berry important question


Image from The Graphics Fairy

I'm late, far too late, for the Wednesday Hodgepodge, so I've selected just one of the questions to answer.  I'm sure you can guess why this one appealed to me most out of all the other questions:

4. June 14th is National Strawberry Shortcake Day...are you a fan, and if so will you celebrate? How do you make yours? Have you been strawberry picking? If so what do you do with all those berries?

I am definitely a strawberry shortcake fan. 

I wasn't aware, or didn't remember, that June 14th was National Strawberry Shortcake Day.  So we didn't celebrate.   But we could have, although we were traveling that day.  Let me explain.  

We had traveled up to Boothbay Harbor, Maine, on Monday, June 12 and spent two nights at a lovely B&B with friends from Pennsylvania.  On June 14, we were heading home and passed through the city of Brunswick.  Still full from our hearty breakfast, we stopped at Dunkin Donuts for a break and an iced coffee to share.

BUT across the street was this place:

You can tell it's April, not June, in this photo of The Brunswick Diner.

where, on a rainy April day some years ago,  we ate the best strawberry shortcake either of us has ever tasted.  

It was made with baking powder biscuits, strawberries, and real whipped cream, as is the New England way with shortcake.  But there was one important and stellar detail that the Brunswick Diner added: vanilla ice cream in between the strawberry and biscuit layers.  

At home, I make my strawberry shortcake simply with biscuits, strawberries and whipped cream.

Strawberry picking?  Yes, we have often gone.  Not yet this year ... it's been a wet June and I'm not really sure what that will do/has done to the strawberry crop.  But we will very likely go strawberry picking if it's a possibility for us.

Little granddaughter Arielle had a hand (or two) in picking these

Strawberry field where we picked in 2022


What do I do with all those berries?  I usually freeze some whole.  We wash and hull the berries, then place them on a cookie sheet and freeze until solid.  Then they are transferred to zip-top plastic bags.  Now we have frozen berries that will not clump together and one can pour out whatever is needed for a recipe.

To use the fresh berries, probably my favorite thing to make would be strawberry shortcake.  To be a little more fancy, this Strawberry Lovers' Pie is another huge favorite.  


And this Strawberry Cheesecake Pie is another. 

Photo from Spend with Pennies.com

I also like this homemade Strawberry Pie Filling as another way to use fresh berries.  

 
And these Strawberry Muffins (or, as you will see, Strawberry Coffeecake) are also scrumptious!

And there's my answer to a berry important question. 


Wednesday, April 05, 2023

Hopping into the Hodgepodge


It's Wednesday again, so it's time for the Hodgepodge -- the linkup where Joyce, at  From This Side of the Pond, asks the questions and bloggers provide the answers on their own blogs.  This week's Hodgepodge questions have a spring and Easter theme.   Here goes:

1.What would you say is the most difficult task when it comes to spring cleaning? Have you completed that task this year? Any plans to get it done?

I don't do actual spring cleaning, preferring to try and keep up with cleaning tasks all year round, but I do find that windows need cleaning in spring after a long and messy winter.  Mr. T and I will work at it together, but it's not done yet.  Our house is still surrounded by snow.

A 1954 Wonder Book ready to list in my Etsy shop

2. Your favorite pastel color? Favorite thing you own in a pastel shade? 

Oh, that's a good question.  Possibly mint green, possibly peach, possibly light blue. Favorite thing I own in a pastel shade would probably be a peach colored sweater.


3. Do you like ham? Do you fix ham year round or is it mostly just a 'holiday food'? Baked ham-ham and eggs-ham and cheese sandwich-scalloped potatoes and ham-Hawaiian pizza....what's your pleasure? 
 
I do like ham.   I tend to only cook a ham at holiday time, but really there's no reason why I don't cook one any time of year.  I have a hot ham and potato salad recipe that we really enjoy.  Hawaiian pizza is good too -- I usually use barbecue sauce rather than pizza sauce on it.  I guess I have never posted that ham potato salad recipe, so there is no time like the present.   It really is delicious.  One could probably adapt it to use leftover Easter ham, but I've always just used ham steak.

HOT  HAM  AND  POTATO  SALAD
 
2 lb. red potatoes, scrubbed and cut in 1-inch cubes
8 ounces smoked ham steak, cut in 1/2-inch cubes
1/2 cup thinly sliced celery
1/2 cup chopped onion
3 Tblsp. cider vinegar
1 Tblsp. honey
2 tsp. coarse-grained mustard (I often use the Dijon pub-style with mustard seeds)
1/3 to 1/2 cup mayonnaise (light works fine)
1/4 tsp. pepper
1/4 tsp. salt
1/4 tsp. Tabasco sauce
Chopped parsley to taste
Hard-boiled eggs, peeled and quartered (optional)
Plum tomatoes, quartered (optional)

    Place potatoes in saucepan; cover with lightly salted water.  Bring to boil, cover, lower heat, and simmer until just tender, about 15 minutes.
    Meanwhile, cook ham in a large skillet over medium heat, stirring occasionally, about 5 minutes or until lightly browned.  Remove  ham to a large bowl, using a slotted spoon.  Add celery and onion to the bowl.
    Pour vinegar into warm skillet, stirring to dissolve browned bits in bottom of pan.  Stir in honey and mustard.  Slowly whisk in mayo.  Add salt, pepper, and Tabasco.
    Drain cooked potatoes and, while still warm, add to mixing bowl.  Pour dressing over potatoes.  Toss gently to combine, then sprinkle on the chopped parsley.  Serve salad in a shallow bowl (or even in the skillet) encircled with egg and tomato quarters (sprinkled with salt & pepper) if desired.  Serve warm.

Yield :  4 servings.


4. Do you celebrate Easter? What did Easter look like when you were a kid? What are your plans for Easter this year? 
 
I do celebrate Easter! Joyously!  

When I was a kid, Easter was not a holiday that I fully understood.  We did go to church, but the Gospel was not really part of it.  We did not have Easter baskets.  Instead, my mother hid jelly beans around the house for us to collect.  We usually did have a lovely Easter dinner at my grandmother's farmhouse.

 Easter plans this year include an early outdoor service, breakfast at the church, then an Easter worship service.  My daughter and I plan to collaborate on Easter dinner at her house.  Yes, it will include ham!

5. Something that makes you feel hopeful amidst all the chaos and confusion this world brings? 

I can give only one possible answer to this: the fact that God is in complete control and that He is working all things after the counsel of His own will -- and that one day all wrongs will be made right.

6. Insert your own random thought here. 

Looking forward to dinner out with old friends this evening (Tuesday).  It will be good to catch up. 

And that's the Hodgepodge!  Have a wonderful Easter, everyone!

Monday, December 12, 2022

December weekend 2


 It was another festive weekend as we move toward Christmas!

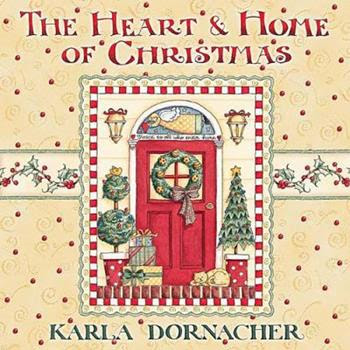
I've already told you about the Christmas book (pictured above)  that I found at our local thrift store last week, but I will share again for any who may have missed it.  We've been enjoying it very much as it is so Christ-centered.  I paid 50¢, but Thriftbooks has it for $4.19 if you are so inclined.  You can see it here: The Heart & Home of Christmas.  I brought it along to our camp as we stayed over that night.  Mr. T enjoyed reading through it while I worked on other projects.

I guess this book came to mind because we went to the thrift store again this Friday.  It isn't usually a regular stop for us, unless we are dropping off donations.  But last week, we had bought a few Christmas plates (plastic) and we've already used several of them. It seemed a good idea to look for a few more.  These plates were 50¢, so it beats the dollar store.  We bought a half dozen in various sizes and designs.

My local daughter also suggested that I check out some special vintage Christmas books she had seen in the Christmas room at this shop.  They are subtitled An American Annual of Christmas Literature and Art.  I did buy one just for fun.  The image below is the one that I bought.  It's from 1959.  I paid $5 but have seen them online for $18 and up!  Some of the older ones at the thrift store were as high as $12.


 I hope to blog about this book later this week when I have time to look through it more.

We browsed the Christmas room a little more and I picked up a package of 3 lovely glass ornaments for only $1 (if I remember right).  The bottom part is painted gold on the inside and the rest is clear.  So pretty!

Also on Friday we did our grocery shopping and picked up a few ingredients for cookie baking. Our supermarket has rolls of really fun kraft wrapping paper for $1.99, so we got a couple rolls.  Probably some of the unused rolls we have in the attic will end up going to the thrift store.  I like these much better!

 Saturday was a festive day from beginning to end.  In the morning I was able to attend a monthly ladies' Bible study which I enjoy so much.  I've mentioned our friend Amanda Reed, who leads this study, before.  This summer, she and her family moved to a beautiful log cabin with amazing views.  It was so fun to see how Amanda had added Christmasy touches like bows and ornaments to snowshoes both on her porch and on inside walls (and I wish I'd had a means of taking photos).  She also had jars of simple greenery all around the house.  

This was the last Bible study for awhile as we finished up this study on idolatry: More Than Anything.  We will resume in the spring with a new study.


Amanda had prepared a lovely brunch for us as it was our last time together for awhile: a delicious egg bake, fruit salad, pecan coffeecake, and smoothies.  Beyond kind.  It was such a gift to all of us.  You can read Amanda's latest blog post here: Making a Big Deal of Christmas.  I'm sure you would find it a blessing!

In the afternoon, my hubby and I were embroiled in all kinds of festive pursuits as I finished some cookies and he brought in the Christmas tree.  My hubby had previously made some chocolate pressed cookies in the shape of Christmas trees and I was turning them into little cookie sandwiches with minty white chocolate.

You can find the recipe here: Chocolate Peppermint Trees.  I didn't tint the white chocolate pale green as the recipe says, but instead left it white and then sprinkled on some green sugar.  Below you see them in their freezer box.


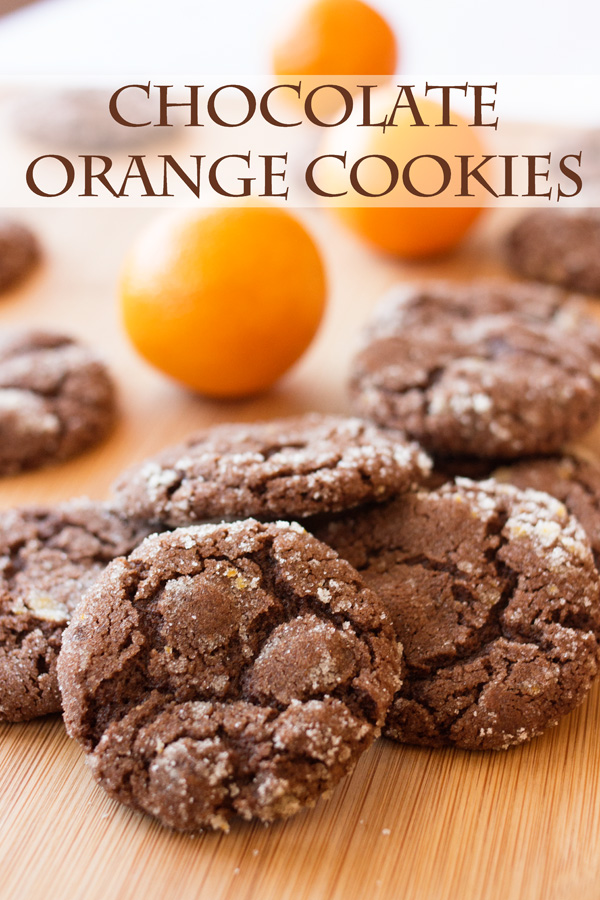
After that, I also baked some Chocolate Orange Cookies.  I just love the festive flavors of chocolate and orange together!

 
All the while, as I baked and he set up the Christmas tree, we had Christmas music playing and it was just a nice time together even though in separate areas much of the time.  We finished decorating the tree together after supper.

And then Sunday was a very festive day as we enjoyed our Christmas program at church.  Lots of music, Scripture, kids playing bells, and much more.  It was a very nice program that showcased the true meaning of Christmas!

Sunday afternoon Mr. T was out of town for a few hours so I wrote some blog posts, packaged up some Etsy orders, and wrote a few Christmas cards.  Below you see what one of the Etsy orders was for -- this gorgeous unused vintage Christmas card.

And that was the second weekend in December!


Thursday, December 08, 2022

December 8


 Well, let's see where things are with our Christmas preparations.  First of all, the Gooseberry Patch Christmas wallpaper above is on my desktop.  Love it!  I very much enjoy Gooseberry Patch art work and am so tickled to be able to have it on my computer.  If you would like to check out their wallpapers, go here: Gooseberry Patch free wallpapers.  They have them for all seasons, not just Christmas.  You are sure to find something fun that you want to use.

In the illustration above, I love that gorgeous metal loaf pan.  My grandmother used to have bakeware resembling that.  I love that this illustration pictures Christmas kitchen gifts!

I've been busy trying to scan and list more vintage Christmas cards at my Etsy shop (link in sidebar).  So many cards, so little time!  Below is one of my recent listings.  This one is especially sweet.

I got a few Christmas gifts ordered and most have already arrived.  I prefer to start wrapping after the tree is up so that I can just place the gifts under the tree and not have to keep them in some "way station" (like our bedroom) until later.

The photo below is from many years ago when we actually had a small narrow tree in our bedroom.  It sparked a memory.  Maybe you would like to read about it.  Go here: "How Beautiful!"

 
Today my hubby is out of town for the day and I'm really hoping to get some cleaning done in our bedroom, as well as perhaps bake a variety of Christmas cookies and write a few blog posts.  We will see!

Speaking of my hubby, he has continued to be busy making fudge and baking Christmas cookies.  He made some Special Holiday Fudge which our faraway daughter particularly enjoys.  So some of that will be winging its way to her soon.  It's a chocolate fudge with raisins and nuts in it.  Tastes a little bit like a Chunky candy bar.

 
He's been trying out the new cookie press from Amazon and is completely unimpressed with it.  In fact, I think we will be returning it.  It was a little sturdier than he hoped, but the ratchet system for pressing out the cookie dough is terribly weak and has nearly broken after just one use.

We kept an eye on the weather forecast for a week and finally, on Tuesday night, it was warm enough to spend the night at our little camp.  It was a very rainy night, but our daughter, son-in-law, and their youngest braved the trek through the woods to visit for awhile.  I do apologize for the dark and blurry tablet photo, but it gives you an idea of my hubby's temporary system for keeping electric window candles in place.  It's a big improvement over last year's method.

 We love the idea of lighting up the night at our cabin in the woods even when we aren't there, so we have window candles and upstairs tree on a timer.  We hope it shines out a little Christmas cheer to passers-by!

 
A few Christmas cards have arrived, so soon we will be taping those up in our hallway. The photo below is an older one (we no longer have wallpaper in the living room, having covered it with gorgeous wide pine boards) but you get the idea of how our card display usually looks.

 
No definitive word yet on when we'll be setting up the tree.

Okay, I am off to accomplish something rather than just talking about it!