 |
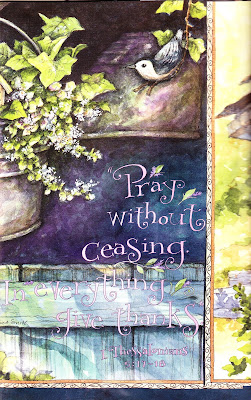
| The back of an envelope; this calendar page featured art by Rebecca Barker |
Those words, which I think are from a 1960s folk tune, were going through my head as I worked on this little recycling project --
handmade bubble mailers. These handmade padded mailing envelopes are a pretty "green" craft -- in fact, they are twice green in that they use not one but two recycled components.
I wanted to send a little handmade necklace to a friend, but had none of the small bubble mailers on hand. I didn't have time or inclination to go to the store and so decided to try a tutorial I had saved some time ago, and make my own mailing envelope. I had actually saved several different tutorials, but the one I've linked to above is the one I used.
Scrapbooking paper or wrapping paper was my first thought, but one of the other tutorials suggested using the heavy paper from magazine covers. That would be nice, but I had another thought -- why not try using some of the beautiful calendar pages I've saved over time? Some of these I have framed, others just tacked up as they are. But I still had a stack I couldn't bear to throw away and no real clear idea how I would eventually use them. So I tried using one and it worked so well I made a bunch of envelopes in 2 different sizes -- 5x7 and 6x9. I often use padded mailers to send small items to faraway family and friends, and I know they will enjoy receiving these special homemade ones.
I had lots of bubble wrap on hand, recycled from various boxes of goods from here and there. So that is my second "green" component -- I was re-using another on-hand material.
A couple of helpful hints: I did find that, in using the calendar pages, the 5x7 envelopes didn't really need to be lined with bubble wrap. I did use it on a couple of them but then decided it wasn't necessary. I did add it for all of the larger envelopes. I also found that the bottom seam on the envelope -- the first seam you glue -- really should be reinforced with tape before mailing. I had glued it with rubber cement and clamped it with clothespins overnight, and it looked fine when I mailed it. But when my friend received the envelope, that entire seam was open! Don't know if it was due to heat, humidity, or what, but it was open. Thankfully, the necklace survived the trip just fine!
But it could easily have been otherwise. So that is why I recommend taping that bottom seam shut.
Here are some of the envelopes I've made:
 |
| Envelope front; from calendar page featuring art by Shelly Reeves Smith |
 |
| Envelope back; from calendar page featuring art by Rebecca Barker |
 |
| Envelope front; from calendar page featuring art by Rebecca Barker |
 |
| Envelope back; from calendar page featuring art by Rebecca Barker |
 |
| Envelope back; from calendar page featuring art by Rebecca Barker |
 |
| Envelope front; from calendar page featuring art by Shelly Reeves Smith |
 |
| Envelope front; from calendar page featuring art by Rebecca Barker |
 |
| Envelope front; from calendar page featuring art by Rebecca Barker |
 |
| Envelope back; from calendar page featuring art by Shelly Reeves Smith |
 |
| Envelope front; from calendar page featuring art by Shelly Reeves Smith |
 |
| Envelope front; from calendar page featuring art by Rebecca Barker |
I am so pleased to have created something beautiful and useful from what might otherwise have been thrown away! In addition, I love the idea that I can share some of my favorite artists with my friends. Do you have magazines or calendar pages in your stash? If so, you might like to try this project also!


Love the use of calendar pages. They're gorgeous! A very creative and fun way to use those beautiful pictures. I'll bet the mail folks enjoyed seeing them, too. ;-)
ReplyDeleteLinda! Hello! So glad you could come up for air (I know how busy you are right now!) and spend a few minutes at my kitchen table. Thanks for your sweet comments.
ReplyDeleteYes, they were fun to make. It was interesting to see how the various pictures turned out. I hope the mail folks did enjoy seeing them, too!